As archers, we spend a lot, I mean a LOT, of time shooting at circles at known distances. Whether they’re 24″ Royal Round 5-color bullseye targets at 20 yards, or historical green-and-gold Luttrell Psalter targets, or Vegas 3-spots, or 40cm NFAA bullseyes at 18 meters, it’s generally circles all the way down. Don’t get me wrong, circles are great targets for building skill and consistency, plus they’re readily available and cheap. But after a while, they get BOOOOORING.
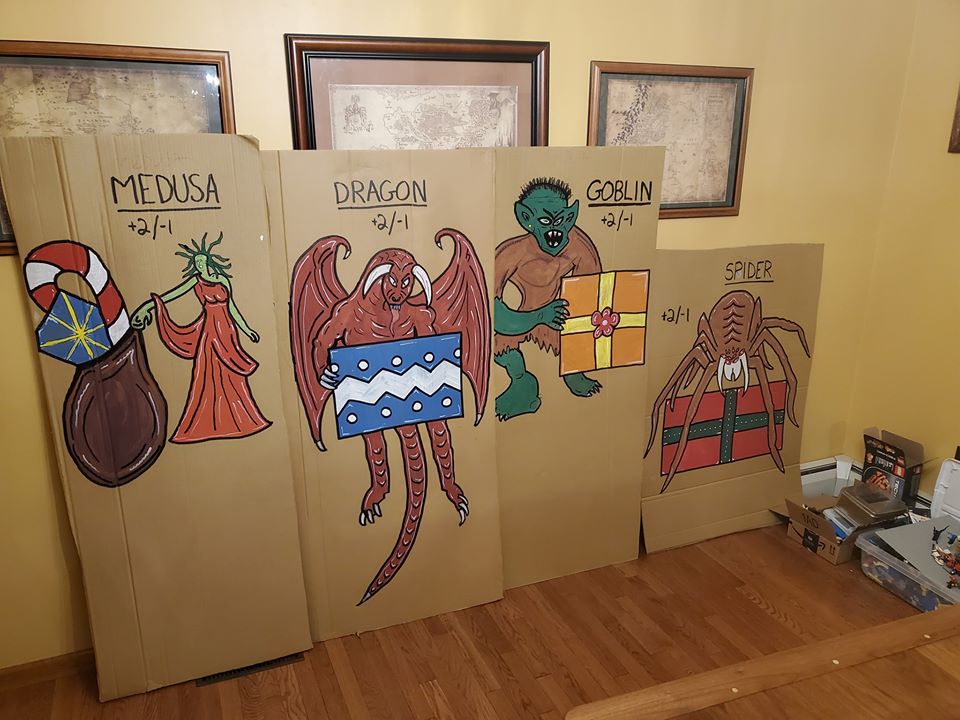
So, typically, when you go to an SCA event that offers archery, the Marshals in Charge try to give you something that’s NOT circles at known distances. Enter… the “novelty target”:
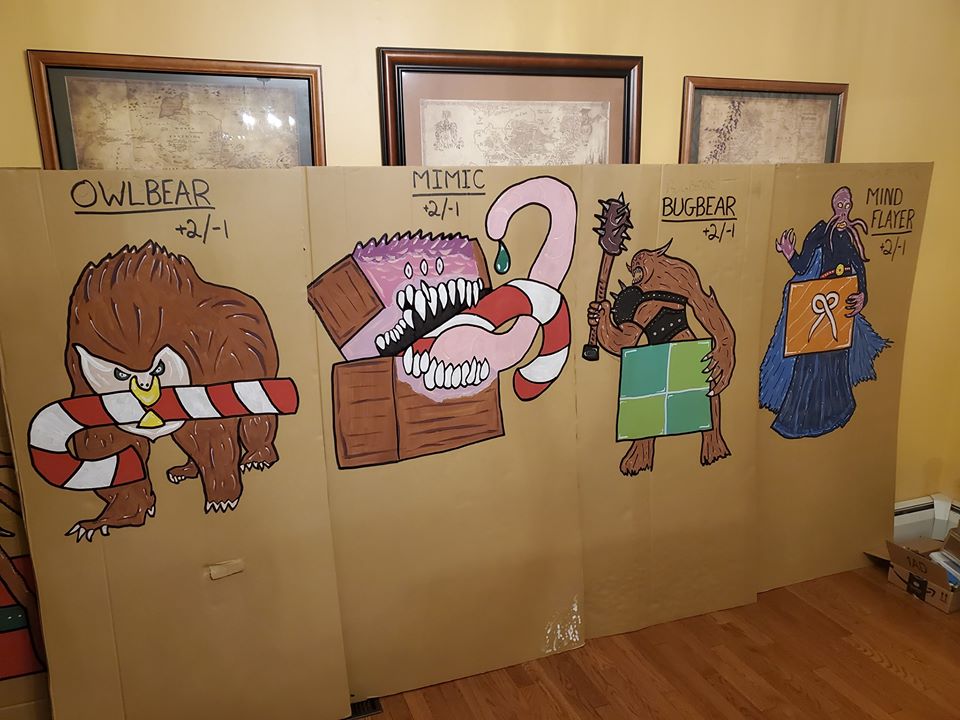
I sometimes have a member of the populace tell me that I’m an amazing artist when they see these. NOTHING could be further from the truth! All I did was trace pictures I liked, slap on some paint, then outline them with a black marker. Honestly, there’s no art to it. A little craftsmanship, maybe, but definitely not “art”. If you’re a Marshal and want to know how we make these targets, here’s how we do it!
Tools & Materials
Computer (laptop/Chromebook preferable. You can probably use a tablet or smartphone, too.)
Pencil (I use a square carpenter’s pencil for thicker lines)
Cardboard, in the sizes you want
Projector
Cheap paints and brushes
Jumbo Sharpie black paint marker
Process & Methods
1. Get a $50 projector on Amazon. Go to Amazon, search for “projector”, filter to $50 or less, and look for one that has the connections you need (DVI/VGA/HDMI/USB C) and find one that’s 4- or 5-star rated. Some of these cheap projectors now even have Bluetooth, so even if you don’t have a laptop, that’s fine – you can hook your smartphone or tablet to them!
2. Find a picture on the internet that you want on the target.
3. Hit up your local appliance sales store and score a bunch of big, thick cardboard for free. Just ask at their front desk and they’ll let you have all you can haul. Best time is afternoon, as their delivery trucks are returning. They’re just going to throw it all into a recycling bin anyways, and pay to have it emptied when it’s full, so they’re happy to let you take as much as you want. Pro Tip: bring a utility knife with you when you go, and you can trim them to the size you want right there, and throw the trash into their dumpster/recycling skip.
4. Lean the cardboard against the wall, use the projector on a table to throw the picture onto the cardboard. Just set the laptop’s display settings to the “duplicate screen” setting, and open the picture in any kind of photo viewing app. Don’t be nervous about using a projector, they’re simple: your computer will see it as a second monitor, and typically just ask you what you want to do when it does.
5. Turn off most of the lights, grab a writing utensil, and trace the picture. Just get the general idea and outline, don’t worry about fine details like fur or hair. Sketch the major elements.
6. Turn your lights back on. Clean up your tracing a little bit.
7. Buy (or have your shire/barony buy!) the cheapest craft paint you can find. Typically this is some variety of kids tempera arts & crafts paint. Get some brushes too – you’ll want a variety of sizes: 2″, 1″, and 1/2″ chip brushes were about all we used. Just cheap chip brushes are fine; avoid foam ones though. They’ll tear, and don’t give fine detail.
8. Paint them all. Go ahead and refer to your originals for the colors. Mix as needed – we used paper plates for palettes. Stay between the lines, more or less. Don’t worry about being too neat right now, we’ll fix that in step 9. If this is absolutely not your thing, enlist your group’s scribes. Pizza and beer work as bribes.
9. Get out your Jumbo Sharpie black paint marker and go over all the lines you traced. Makes a HUGE difference, and provides nice thick lines for scoring.
10. Hang them on your favorite backstops and GO SHOOT THEM UP!


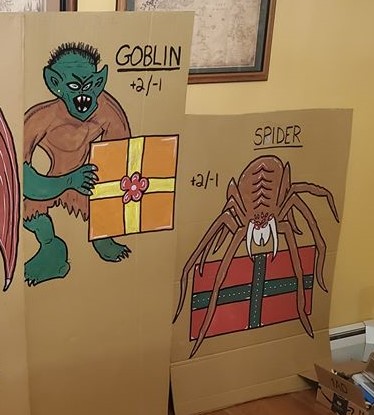
Here are some other targets from a previous year’s Holiday Shoot, “Midwinter in History”, made using this method. Again, the black paint marker is, essentially, magic.
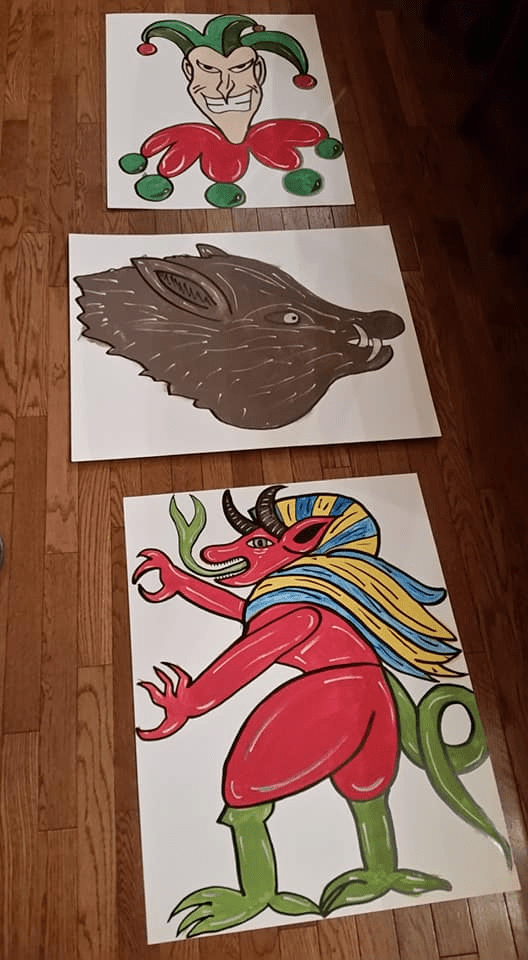
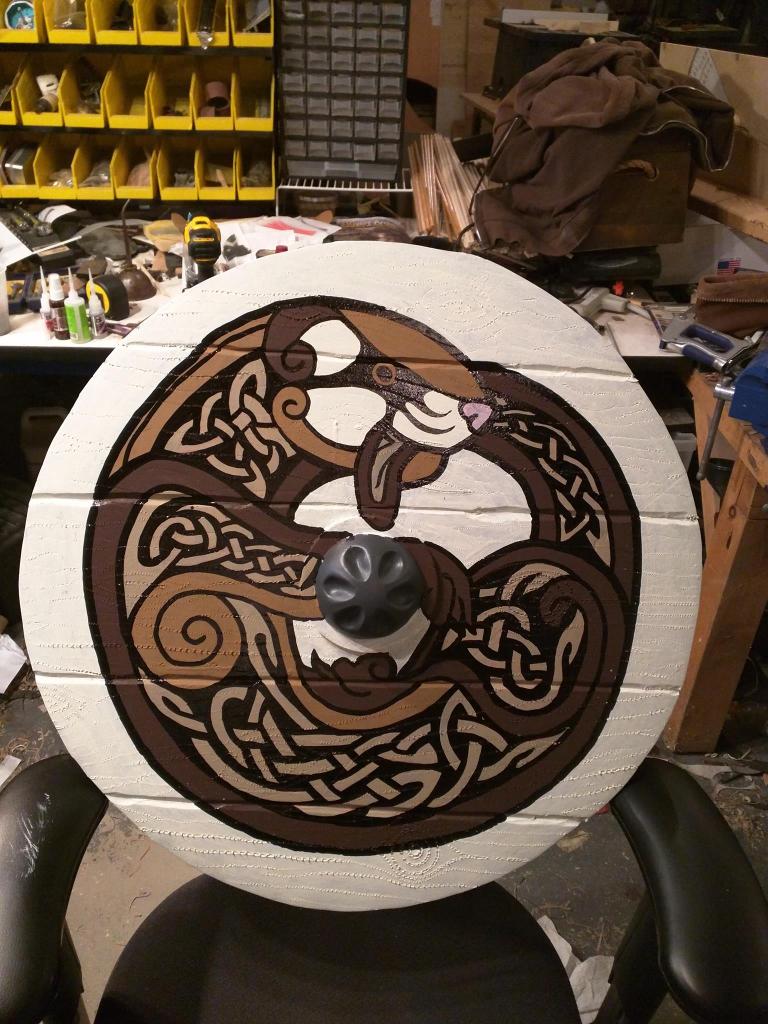
As a bonus, your heavy fighters can use this same method to get their heraldry onto their shields: prop the shield against the wall and use the projector to throw their heraldry onto the shield. Trace, paint, done! You can do some extremely complex designs using this method:

Pitching the idea that your group’s projector can be used for archery targets, by the heavy fighters when they’re painting shields for Crown Tournaments and wars, and by your A&S folks for presentations makes it much easier to get your finance committee to sign off on the projector being a group purchase!
I hope this helps you create fun and challenging targets for your next shoot! It’s not hard to do, and only takes about $100 in materials and tools to get started, with everything being reusable (paints and markers until they run out, but projector and brushes forever) for your next shoot.

Leave a comment