Artisan: Baron Snorri skyti Bjarnarson m.k.a. David A. Haldenwang
Artisan’s Piece
- Copper alloy construction
- Rolled terminals
- Large size, circular
- Stamped decorations
- Rolled attachment of pin
- Filework decorations
Historical Pieces

- Copper alloy construction (all)
- Rolled terminals (#16)
- Large sizes, circular (all)
- Stamped decorations (#22)
- Rolled attachment of pin (#16, 18)
- FIlework decorations (#21)
Historical Justifications & Documentation:
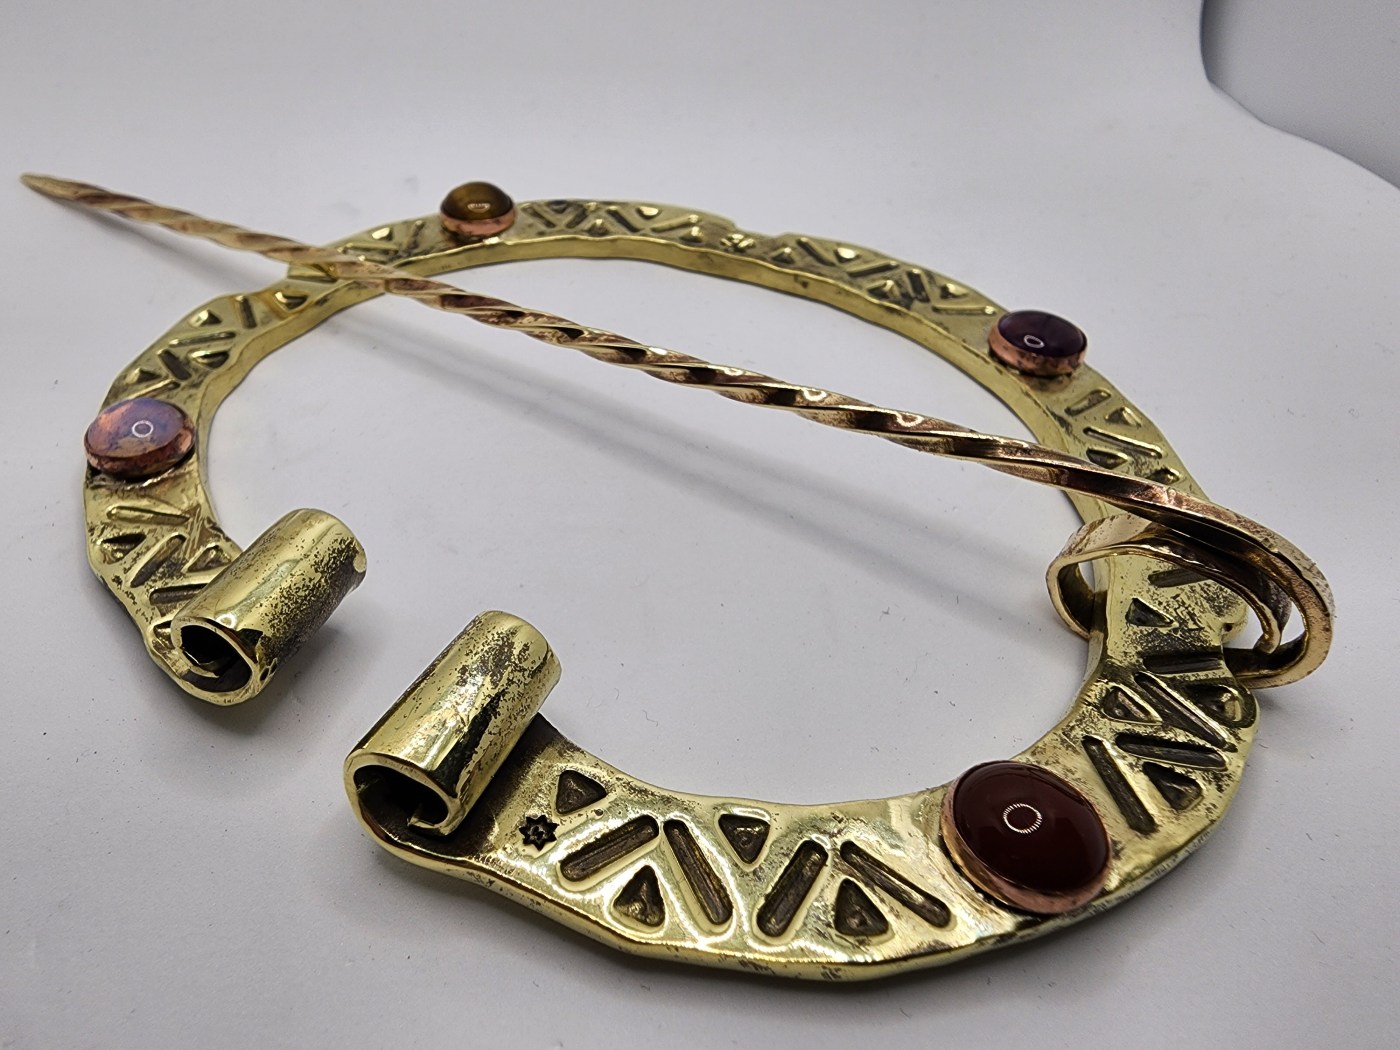
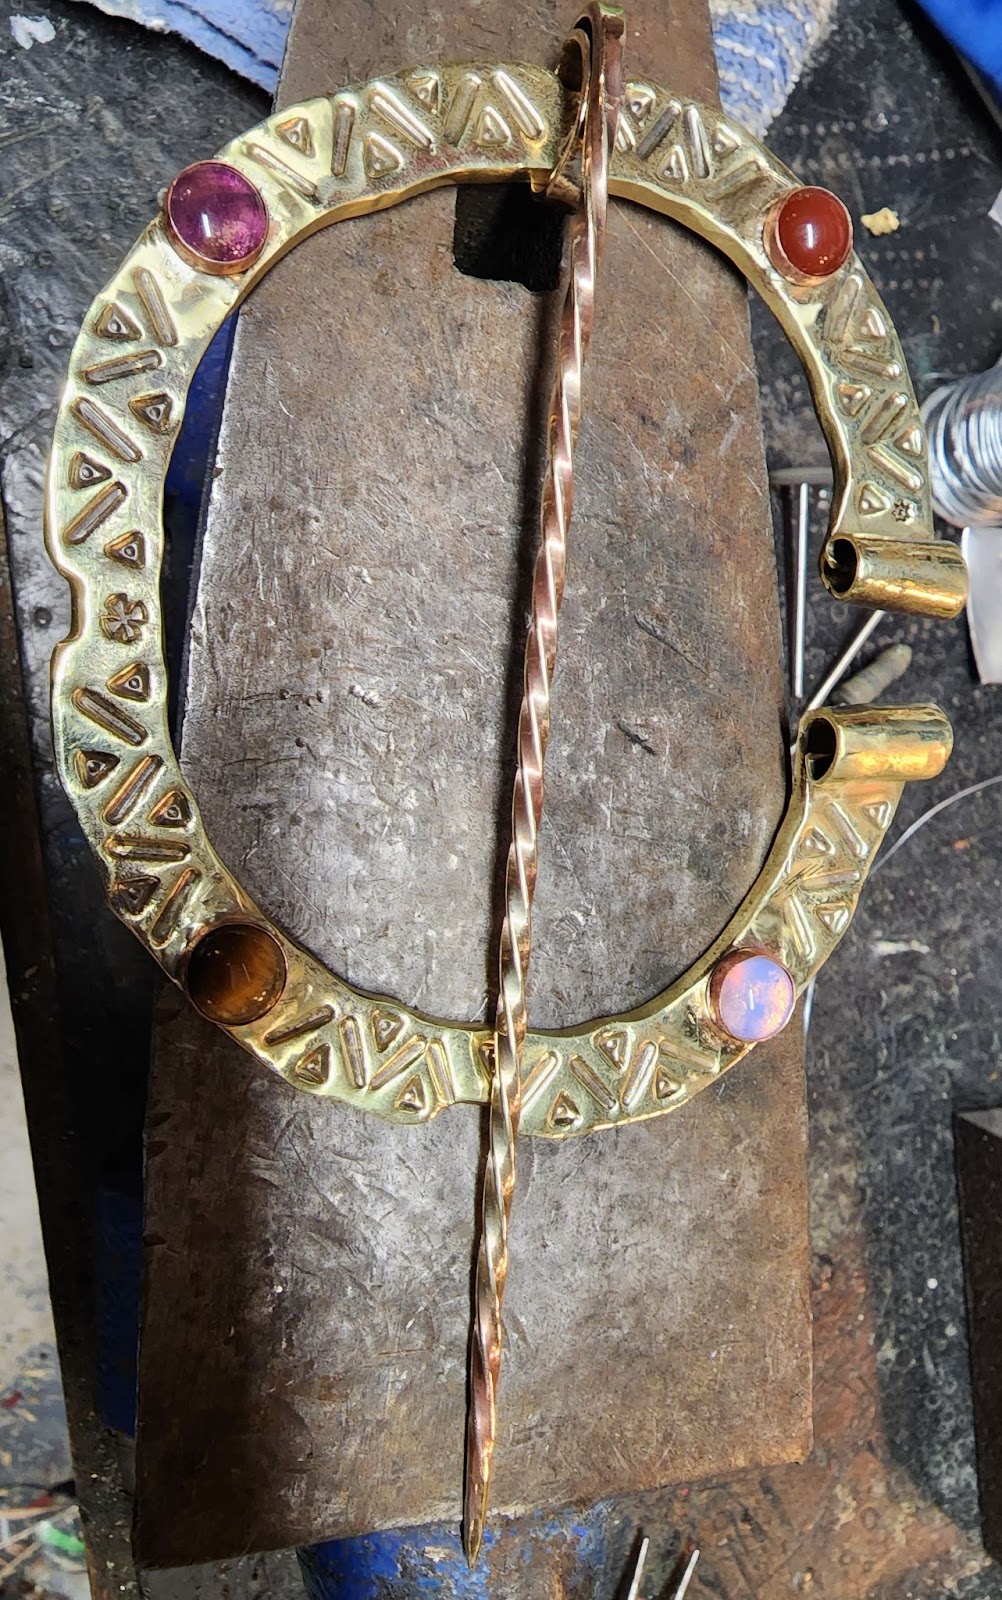
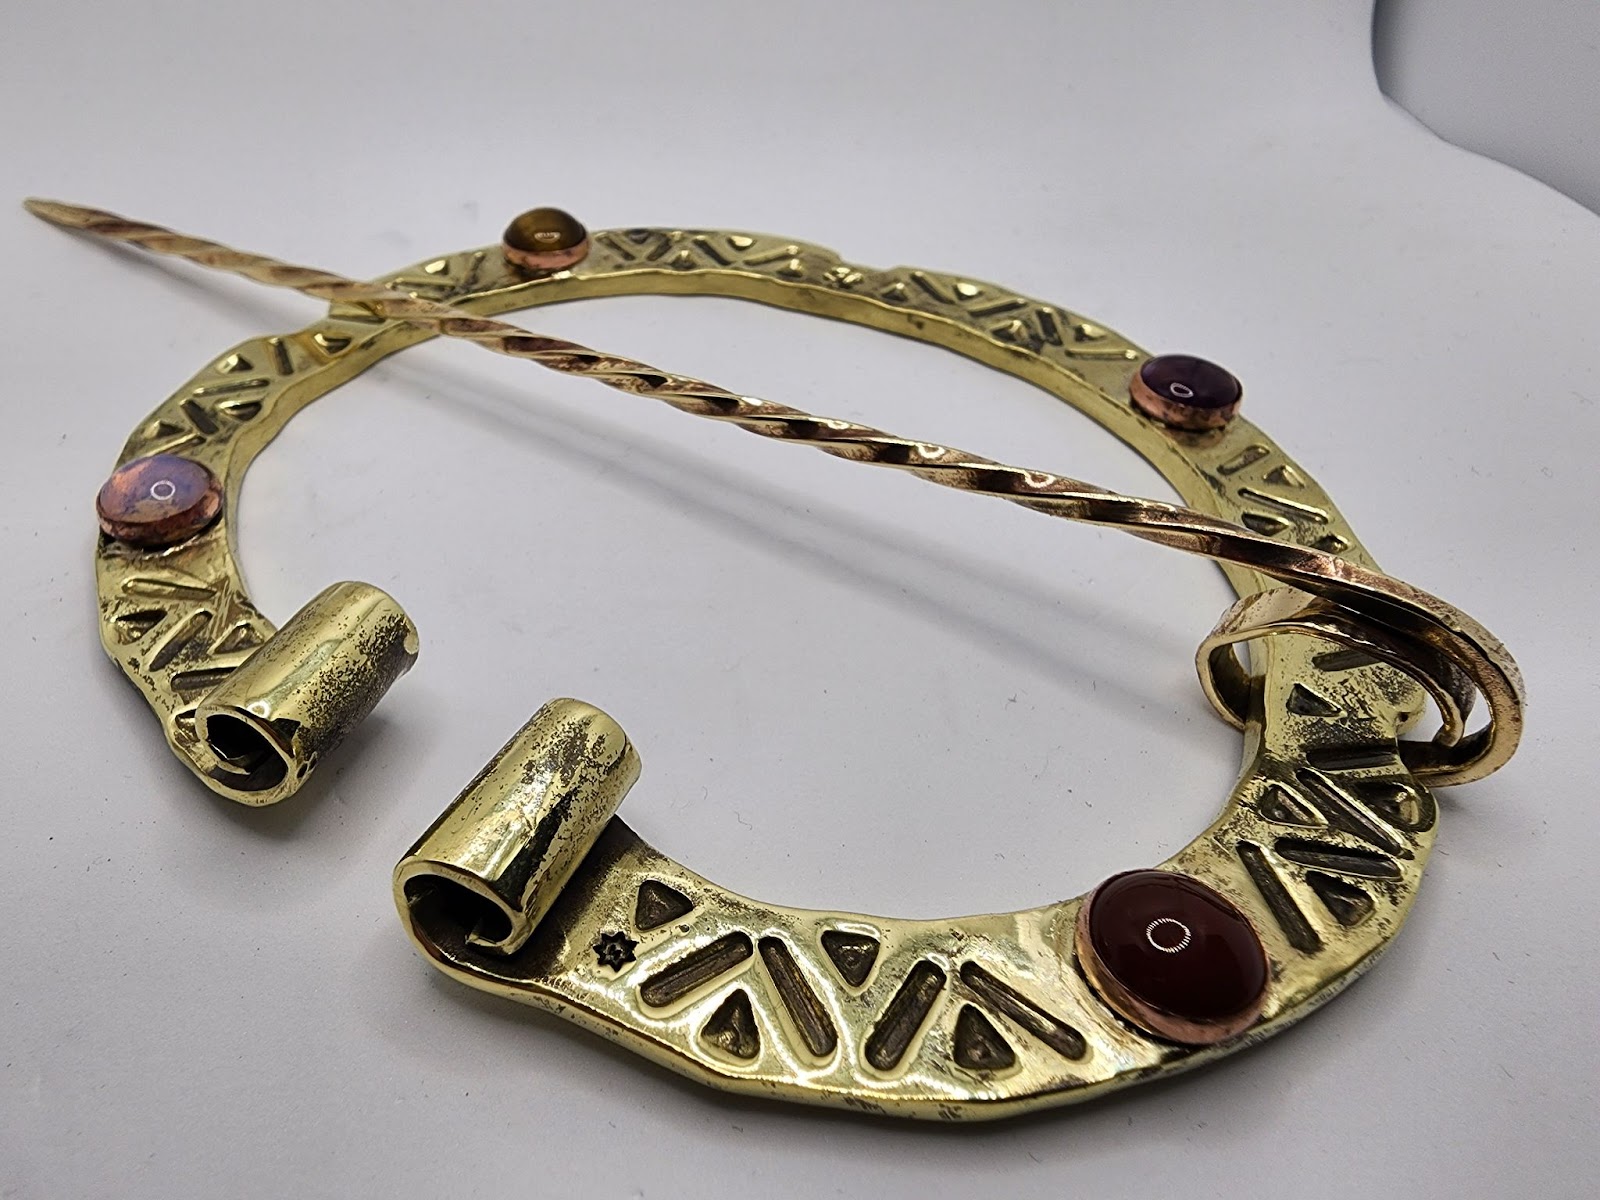
Fig.1: Artist’s finished piece
In the fall of 2022, I was asked to contribute to a Royal Garb Project for TRMs Arnthor and Cierech. Among the various accessories I was tasked with creating was a “Rus Cloak Brooch”.
I wasn’t sure what that actually meant, so I reached out to one of the coordinators of the project, Lady Aurelie of the State College, Pennsylvania shire. She provided me with some reference pictures:
Fig.2: Illumination of Kievan Rus male nobility from the manuscript “Izbornik Svyatoslav” (1073). The cloak-korzno was a draped garment of the Byzantine type, which was worn only by the feudal princely elite. Note the extra-large brooches holding the korzno closed at the neck – this is what I was aiming to evoke.
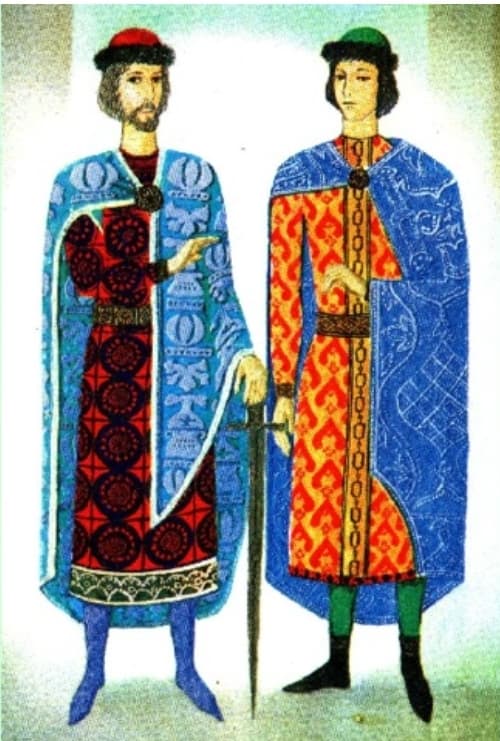
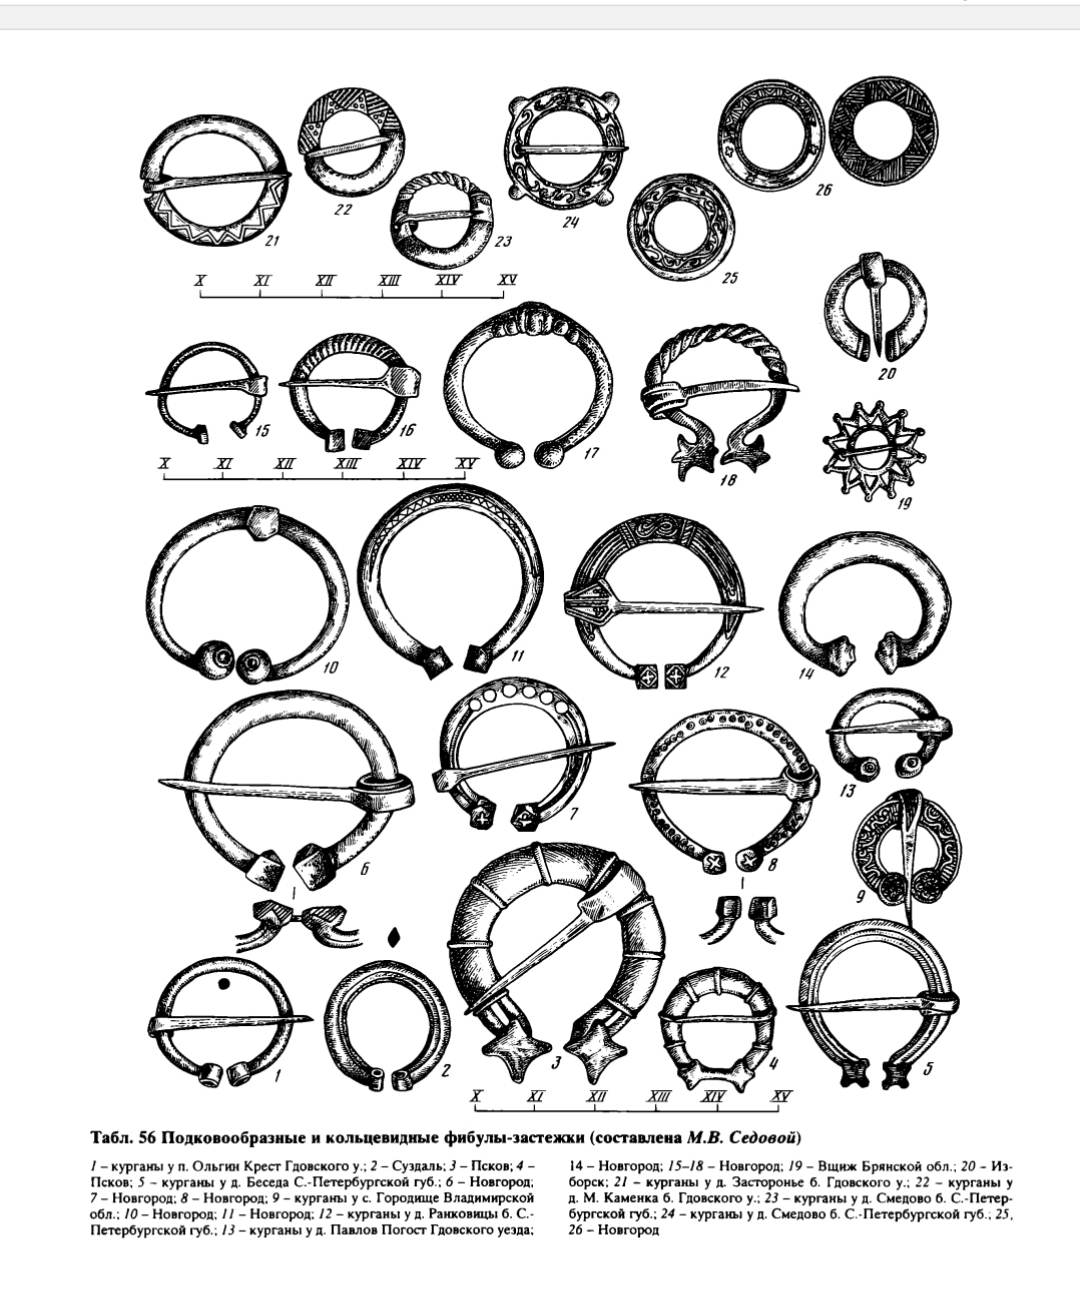
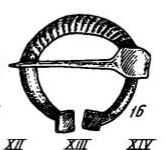
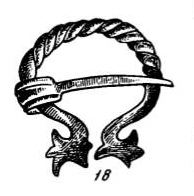
Fig.3: Illustrations of Kievan Rus cloak pins from Rybakov, 1997.
Looking carefully, you can spot all the physical elements (except the gemstones, which are addressed herein later) I incorporated into my piece on this page:
1. Geometric stamping

2. Rolled terminals

3. Pin end rolled around the brooch body

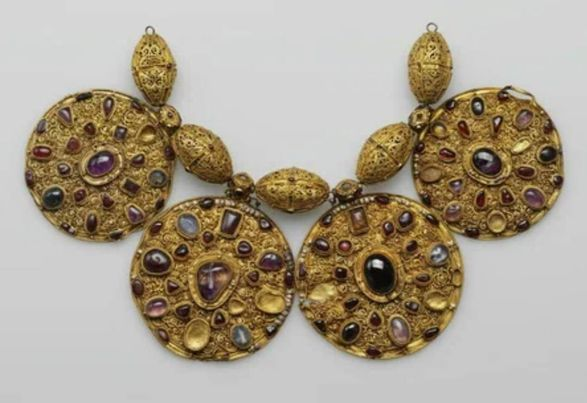
There was a bit of back-and-forth amongst the Garb Project participants as to whether or not I should mount gemstones on the finished product. While Scandinavian Viking jewelry is almost completely devoid of mounted stones (they almost exclusively fashioned gemstones into beads) the Kievan Rus labored under no such aesthetic restrictions. Kievan Rus jewelry exhibits mounted stones in cabochon style on many items owned by high-status individuals, largely due to the strong influence of Byzantine culture. This “barma”, or necklace, is a representative example of such:
Fig.4: Necklace (barma) from the Ryazan treasure, 12th century. Gold, pearls, precious stones; filigree, granulation. State Historical and Cultural Museum-Reserve “Moscow Kremlin”.
As is this tsata, a piece of religious jewelry:
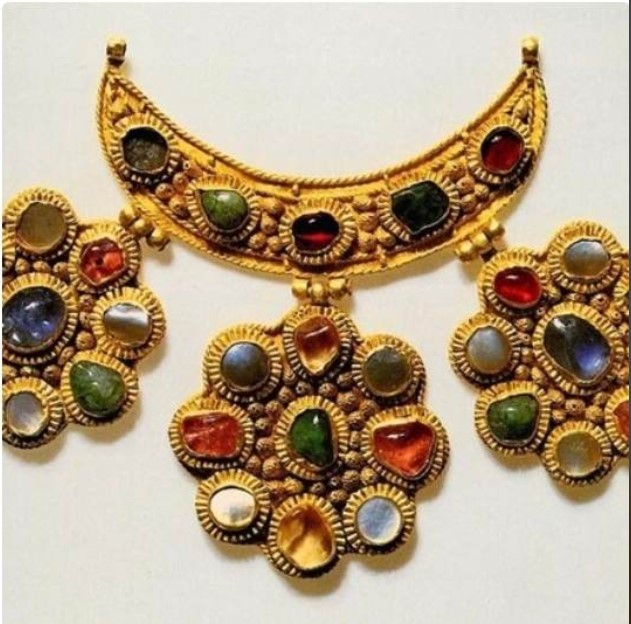
Fig.5: Tsata with three pendants, Russia. Late 14th – early 15th century Gold, sapphires, emeralds, tourmalines, almandines, mother-of-pearl. State Museums of the Moscow Kremlin.
Additionally, Rybakov’s book shows several illustrations of different pieces of jewelry with gemstones:
Fig.6: Ring with cabochon-cut gemstone, Rybakov pp.284
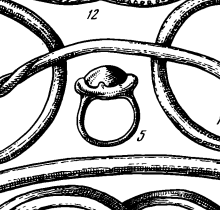
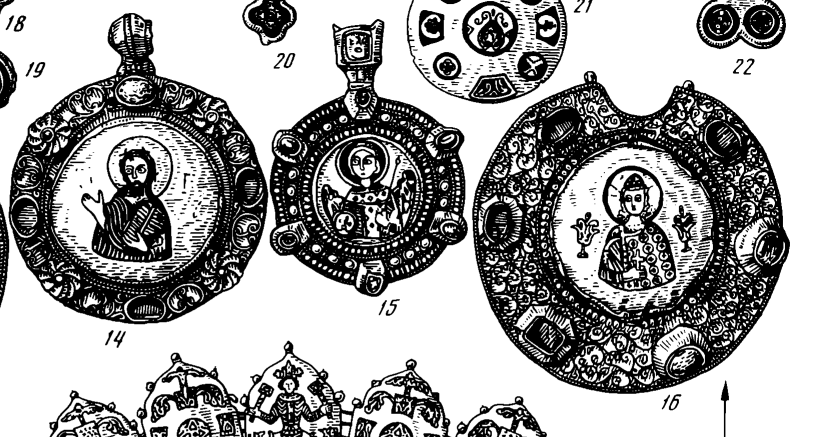
Fig.7: Christian pendants with cabochons mounted around the edges, Rybakov pp.291
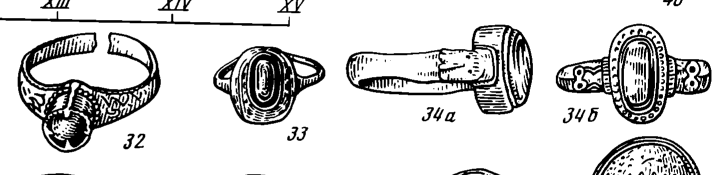
Fig.8: Additional finger rings with cabochon-cut gemstones, Rybakov pp.305
In the end, it was decided that this was a piece for a king, and as such, rated gemstones, so I added them.
Tools & Materials:
The following materials were used in the construction of this piece:
14 gauge red brass sheet
4x commercially-made copper bezel cups
4x 10mm semi-precious gemstones: moonstone, tigerseye, carnelian, amethyst
6” section of ⅛” square red brass wire
Silver solder: medium (used for joining metal)
Liquid flux (flux is a chemical to make solder flow evenly)
The following tools were used:
- Bench vise with 1 ¼” steel pipe section
- Bench-mounted Beverly shear
- Dykes (used for convenience rather than a cold chisel and mallet)
- MAPP gas torch (I lack a forge)
- Oxy-MAPP torch (I still lack a forge)
- Firebricks (used as a work surface to prevent tabletop fires)
- Ceramic soldering tile (fireproof surface to solder on)
- 15 pound anvil
- Assorted hammers: planishing, flat-faced, and drawing
- Assorted mallets: rawhide, poly, and rubber
- Jeweler’s stone setting tools
- Polishing buffer and polishing compounds (I have no information on period polishing techniques or materials)
- Various jeweler’s files: flat, half-round, round, and square
- Decorative triangle-dot, Byzantine cross, and bar stamps of my own construction (stamp construction detailed on my blog)
- Containers of water and mineral spirits (water for quenching after annealing, mineral spirits for cleanup after polishing)
- Assorted non-marring jeweler’s pliers (would have been small blacksmith’s tongs in period)
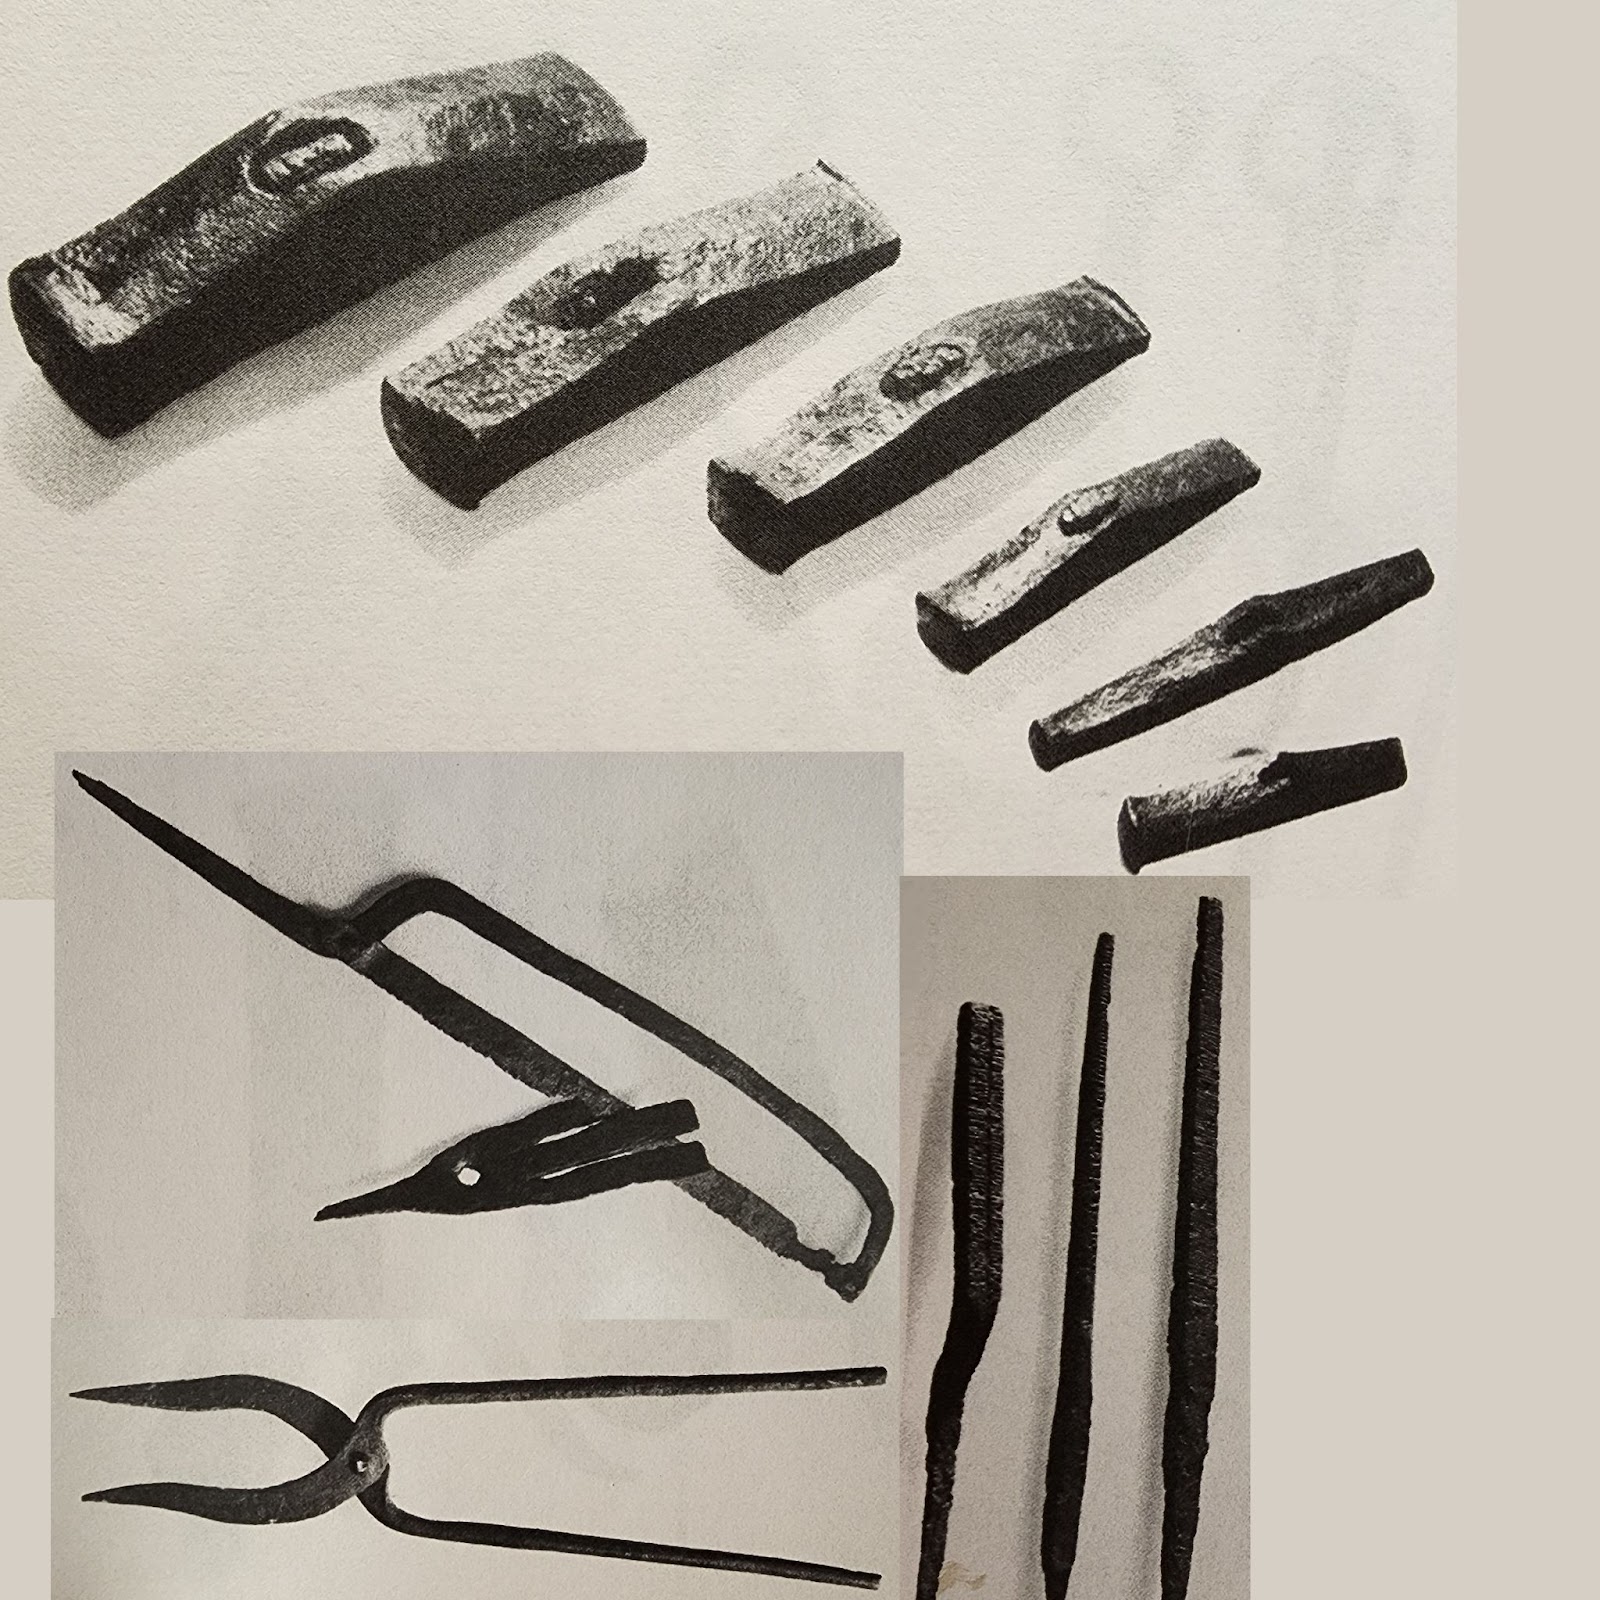
We know that files, decorative stamps, hammers, chisels, and blacksmith’s tongs are period tools due to their inclusion in the Mastermyr find (Arwidsson et al, 1999).
Fig. 9: The author’s own hand tools
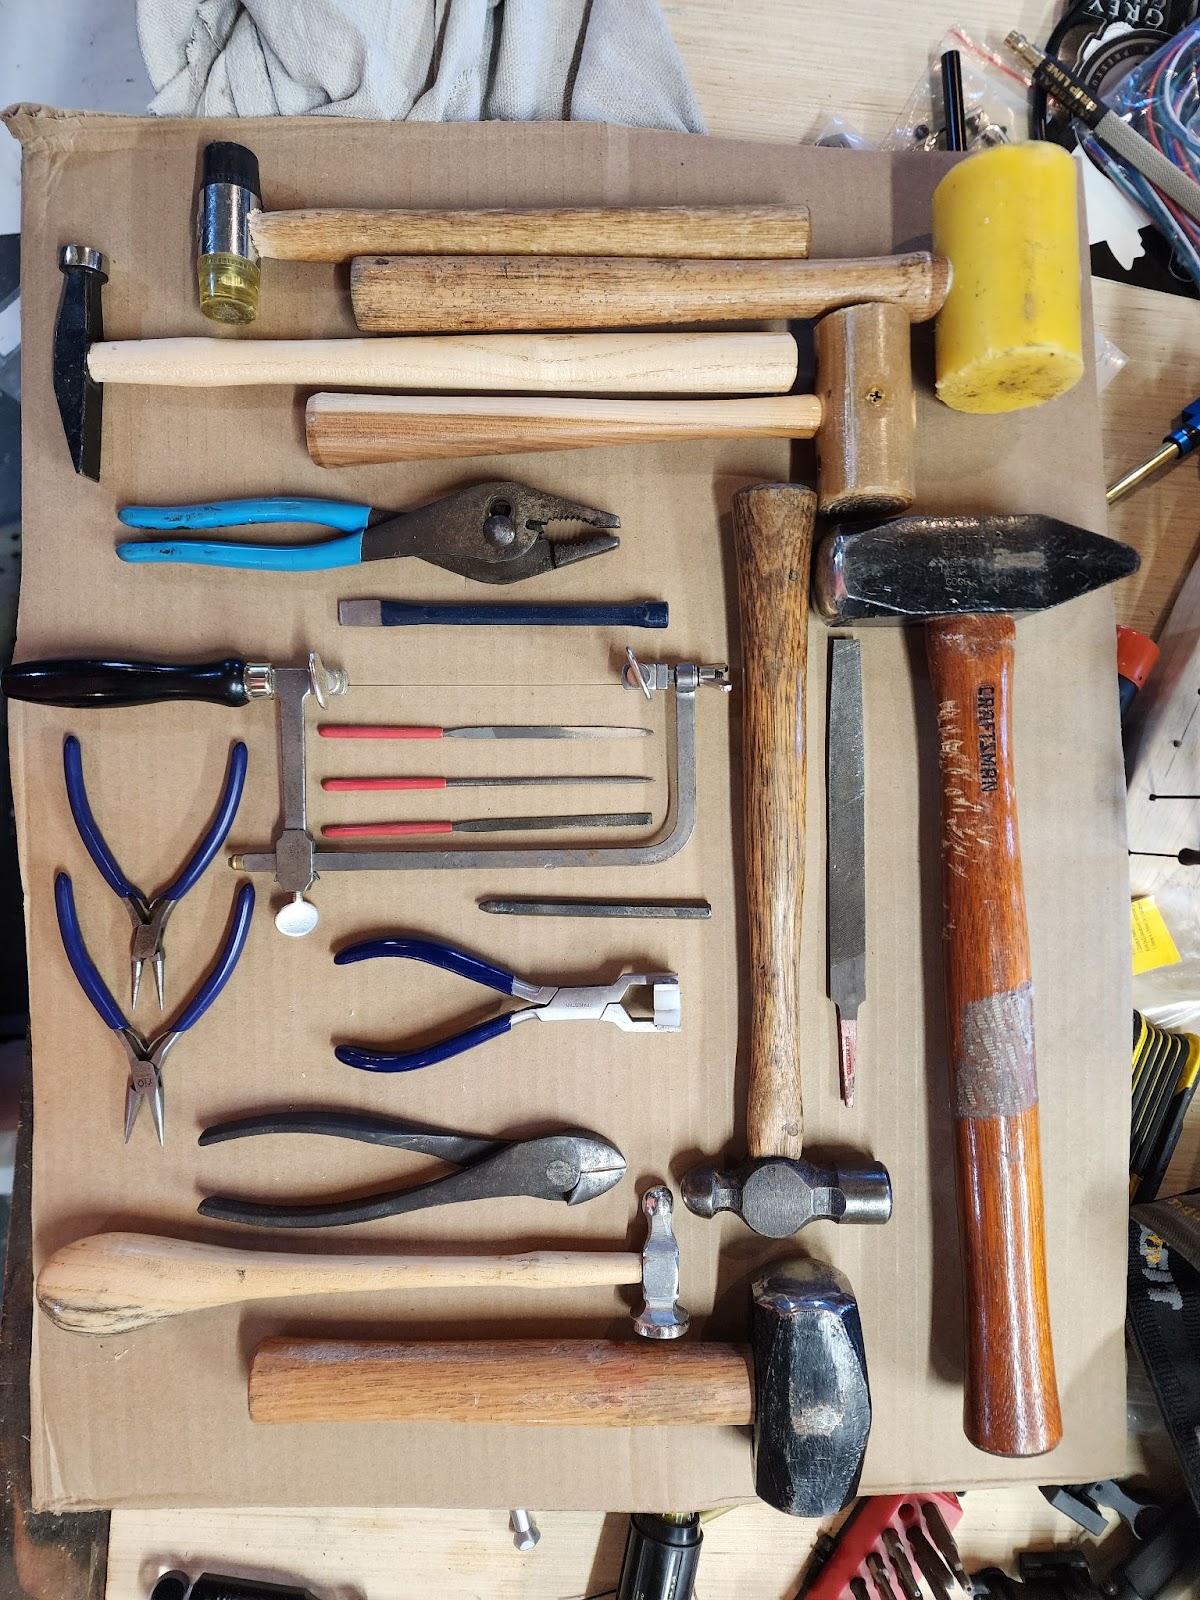
Fig. 10: Hammers, saw, tongs, and files from the Mastermyr tools
Construction Methods:
To start, I annealed a sheet of 14 gauge red brass with a Mapp gas torch to make it more malleable, and cut off a half-inch strip using the Beverly shear. This naturally gave the piece the correct curvature to start with, which is convenient.
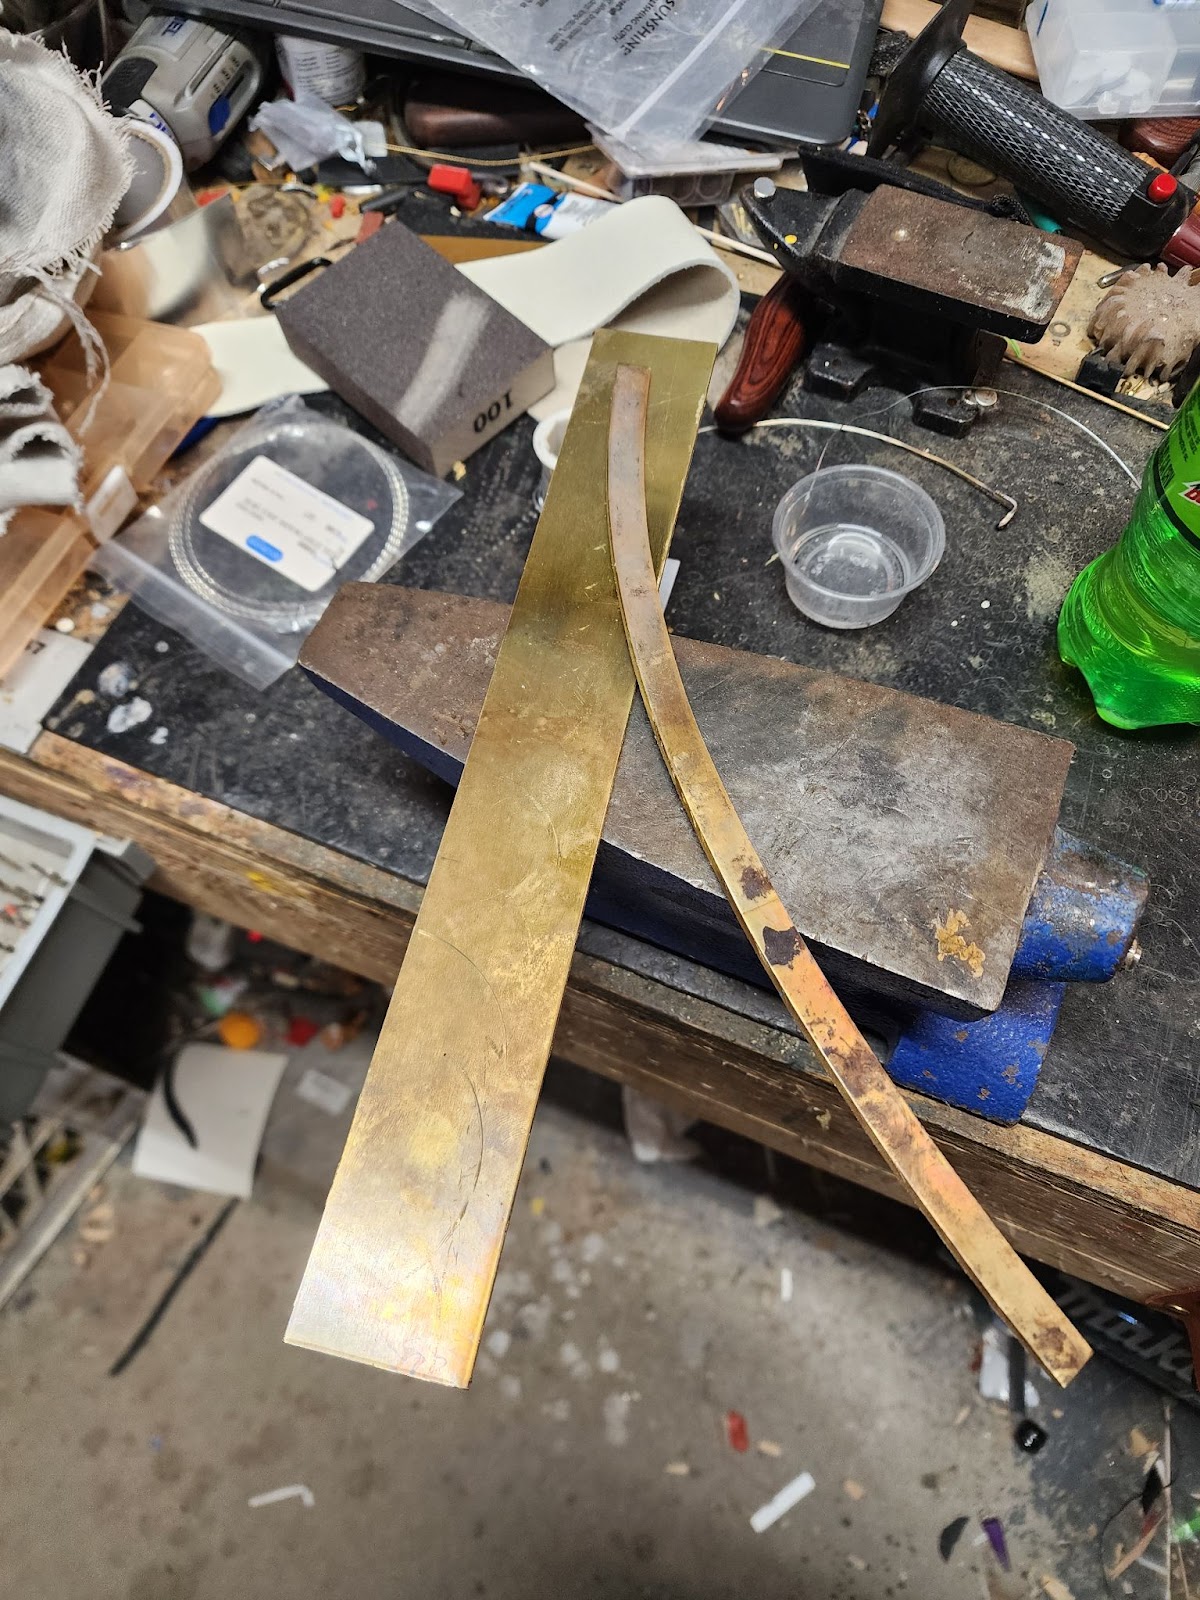
Fig. 11: The initial cut off the annealed sheet
I then clamped a piece of steel pipe in my bench vice, to give me a curved working surface to form the brooch’s circular shape on. In this period, this would have been done over the horn of a large anvil; I do not have such a large anvil, so a pipe suffices. I annealed the piece again, and began forming it into a circle, using heavy blows from a rawhide mallet (using a steel hammer would mar the edges of the piece too much).
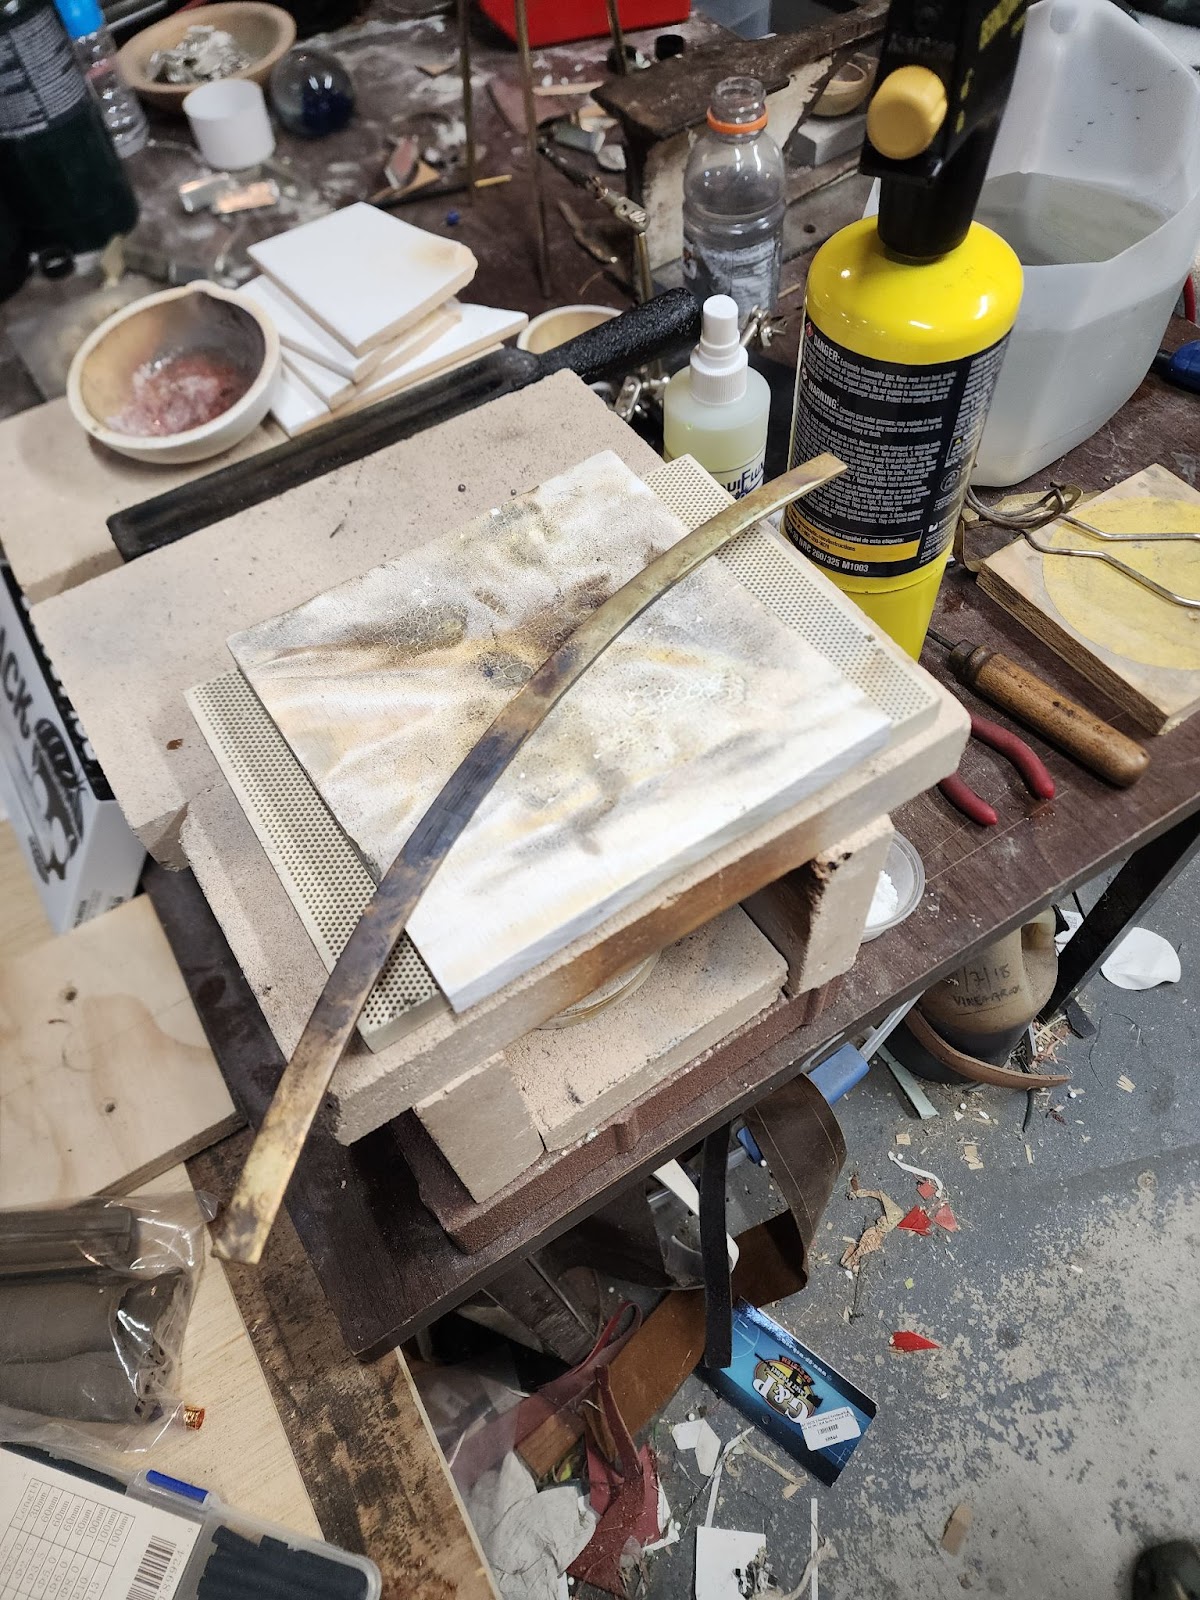
Fig. 12: Beginning to curve it more
Between each round of forming, the piece is annealed again. Copper-alloy metals quickly work-harden, and must be softened by annealing or they will crack.

Fig. 13: Continuing to make the circle shape
After several rounds of forming on the pipe, the circular shape is close enough to done that I’m ready to move on to the ends prior to a final true-up of the form.

Fig. 14: Curve done for now
Again, it’s annealed, then I draw out and flatten the ends thinner, using a convex-faced hammer clamped in my bench vice as a small anvil, and another convex-faced hammer to strike glancing blows. This gives much the same effect as a rolling mill, albeit at the expense of much more work. Then, I clamped one of my decorative stamps in the vice and used a smaller hammer to roll the ends over it, into something like the shape shown in #16, Figure 3. The sides were cleaned up with a large, aggressive file, then with smaller jeweler’s files after they were rolled.

Fig. 15: Flattened and rolled the ends
After forming the rolled ends, the large pipe was replaced in the bench vice as an anvil, and the final round form was shaped with a rawhide mallet.
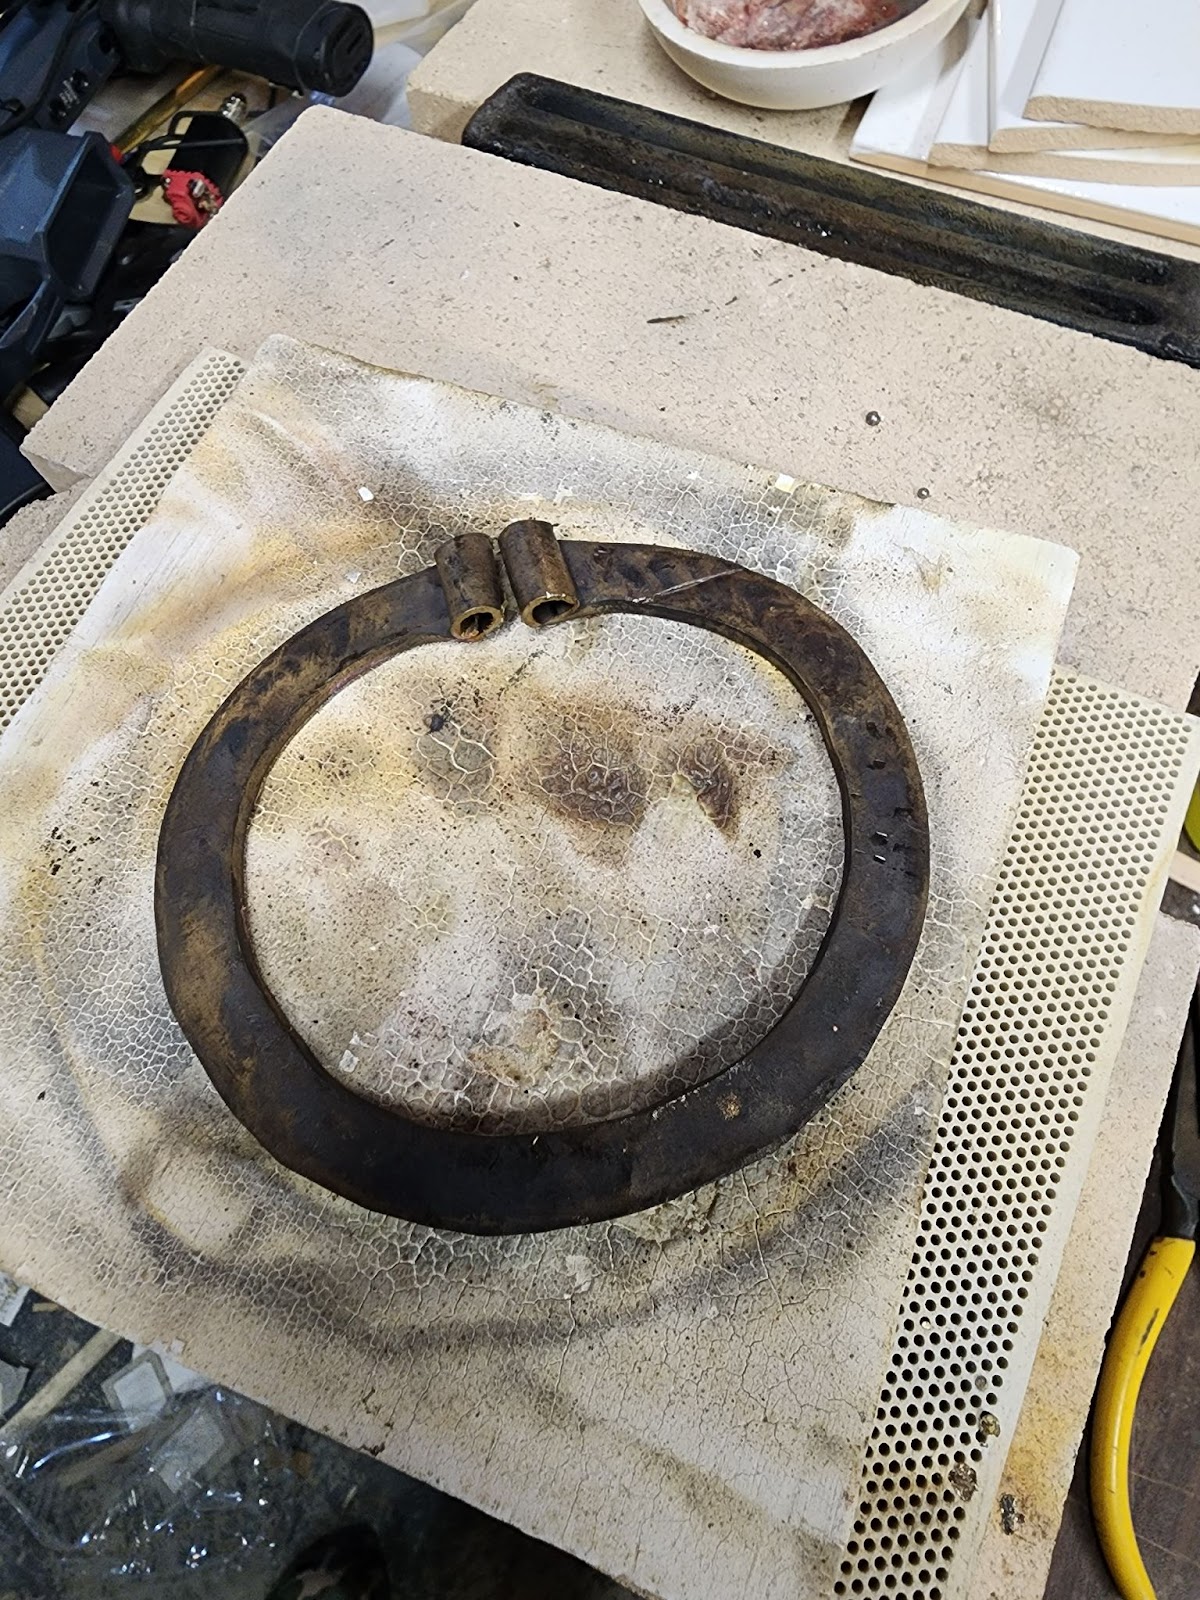
Fig. 16: Finished the circular forming
When the forming of the terminals is done, I anneal again, then mark the piece with a pencil into quadrants. I do a little decorative filework on the outer edges, similar to the shapes shown in #21-24, Figure 3.
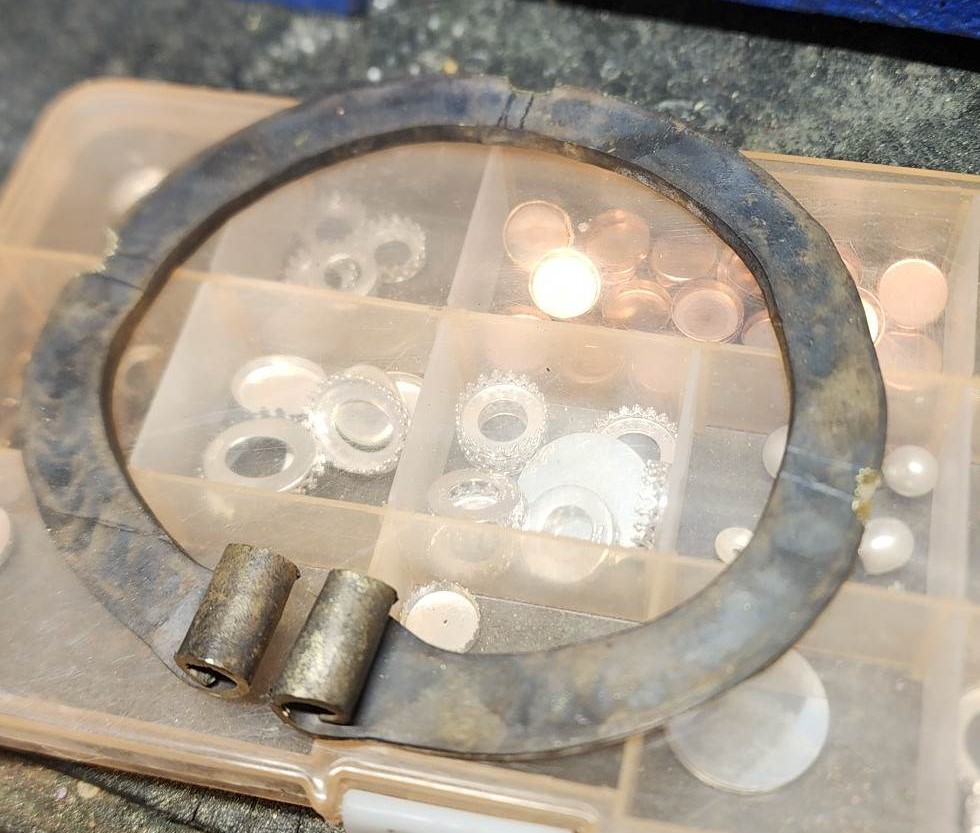
Fig. 17: Simple decorative edge filework
Now that I’ve marked the piece into quadrants, the next step is to mount the bezel cups for the gemstones. I move them around until I’m happy with where they look.
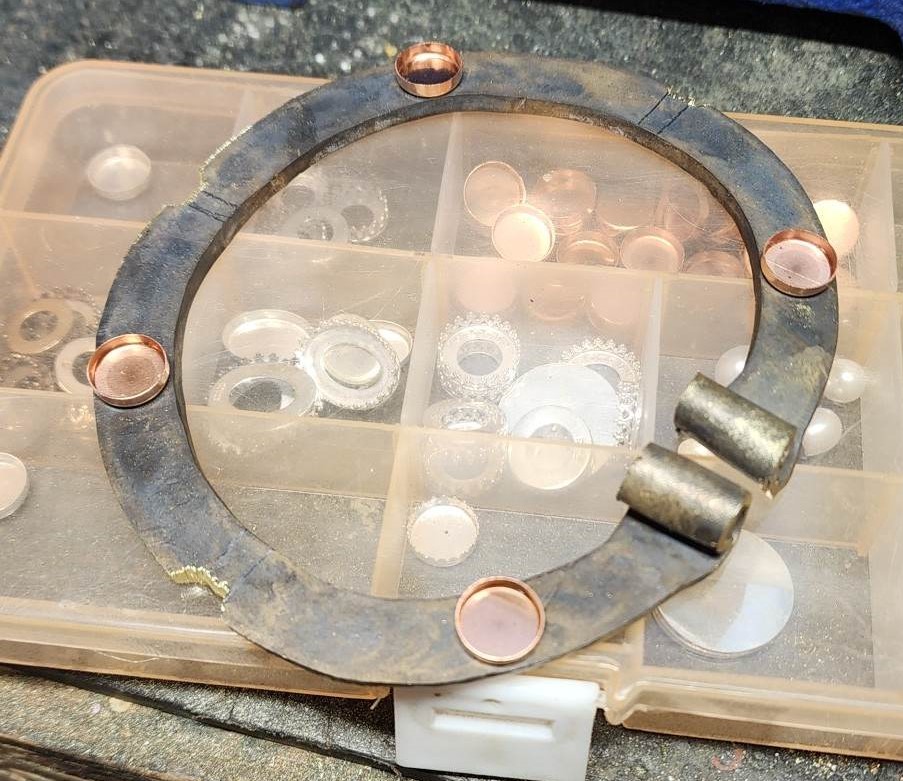
Fig. 17: Figuring out gemstone placement
Then I solder them into place. The area to be soldered is first lightly cleaned up with an abrasive, some flux is brushed on the bottom of the bezel and the place it is going to be placed at, brass-colored medium silver solder is laid in between the bezel cup and the piece, and heat is very precisely applied to the underside of the piece (applying heat directly to the bezel cup will cause it to melt before the body reaches the temperature at which solder will flow) with an extremely fine oxygen-MAPP gas jeweler’s torch until the solder flows.
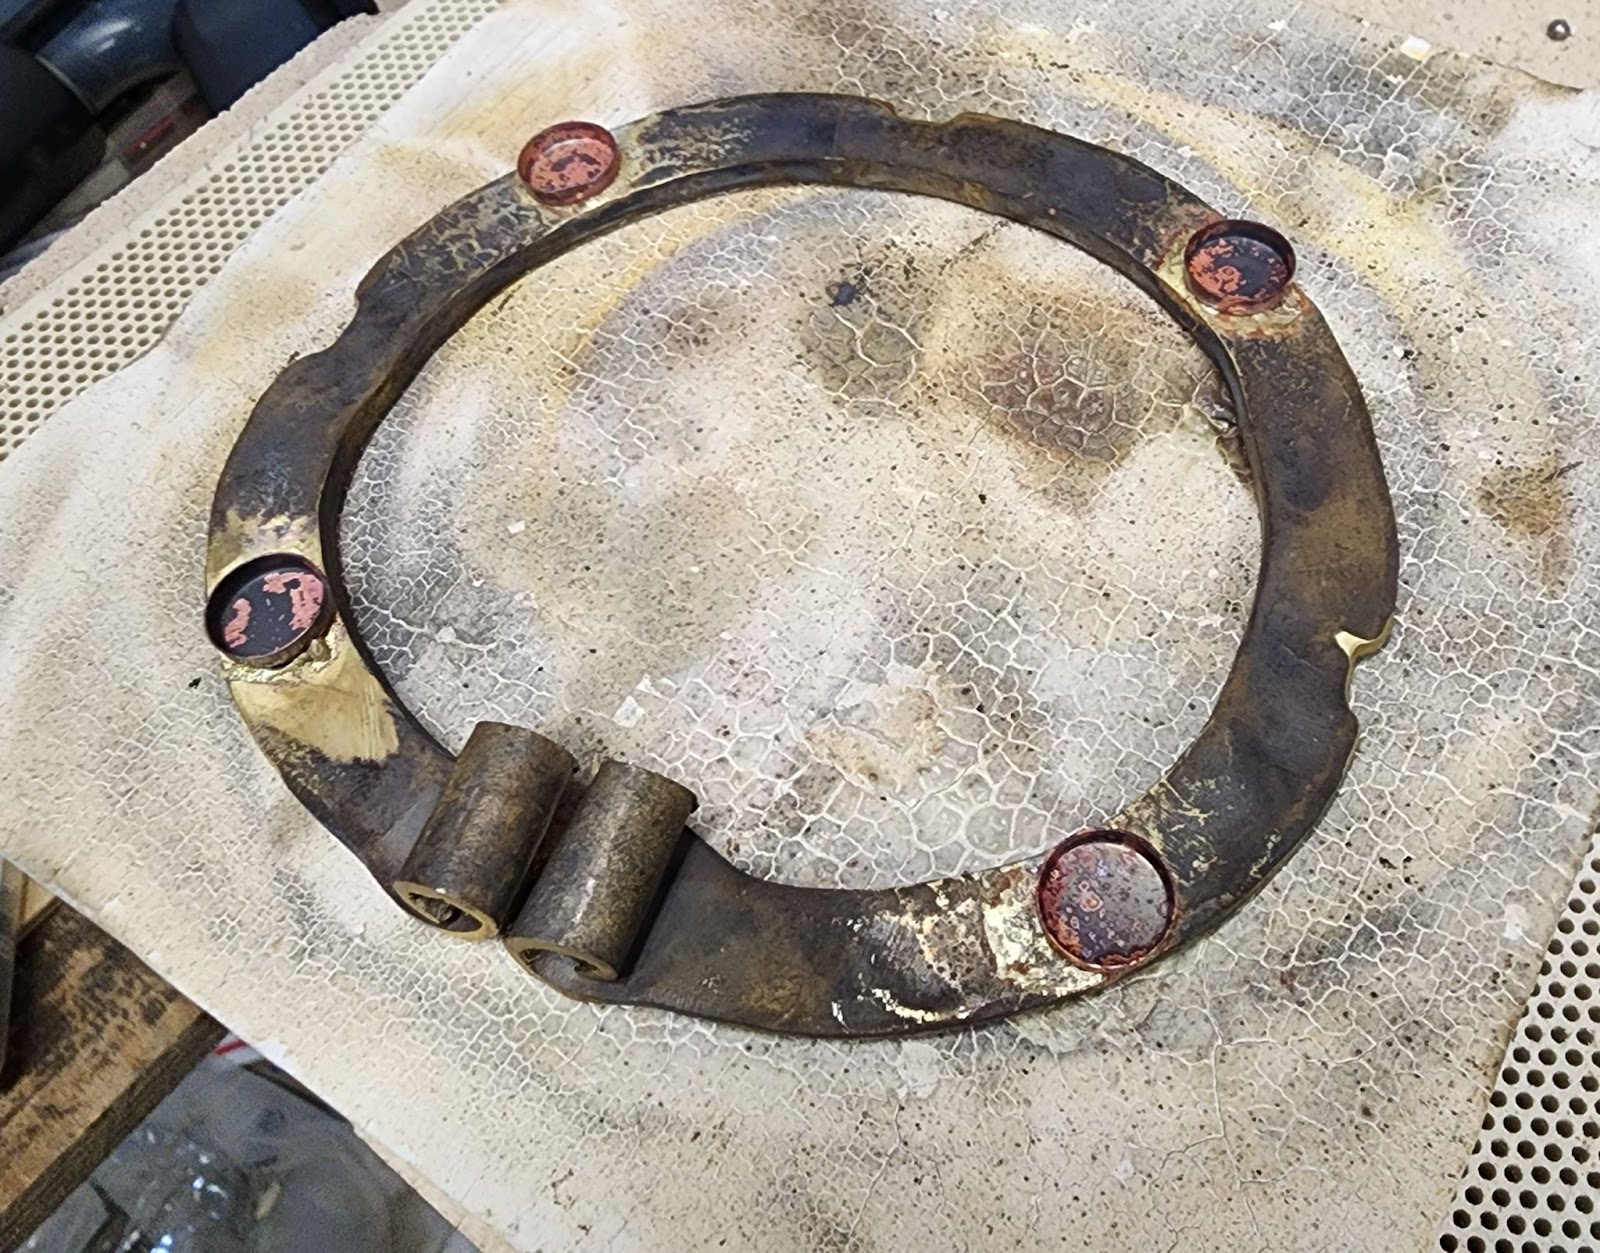
Fig. 17: Post-solder
Once the piece is quenched to cool it, I lay the stones in the bezels to test the fit and overall aesthetic – it’s possible one of the bezel cups got malformed in the heat, but everything fits well.
It is at this point that I am starting to think this might not be a total waste of time and materials; this might actually result in a usable piece that does not look terrible.
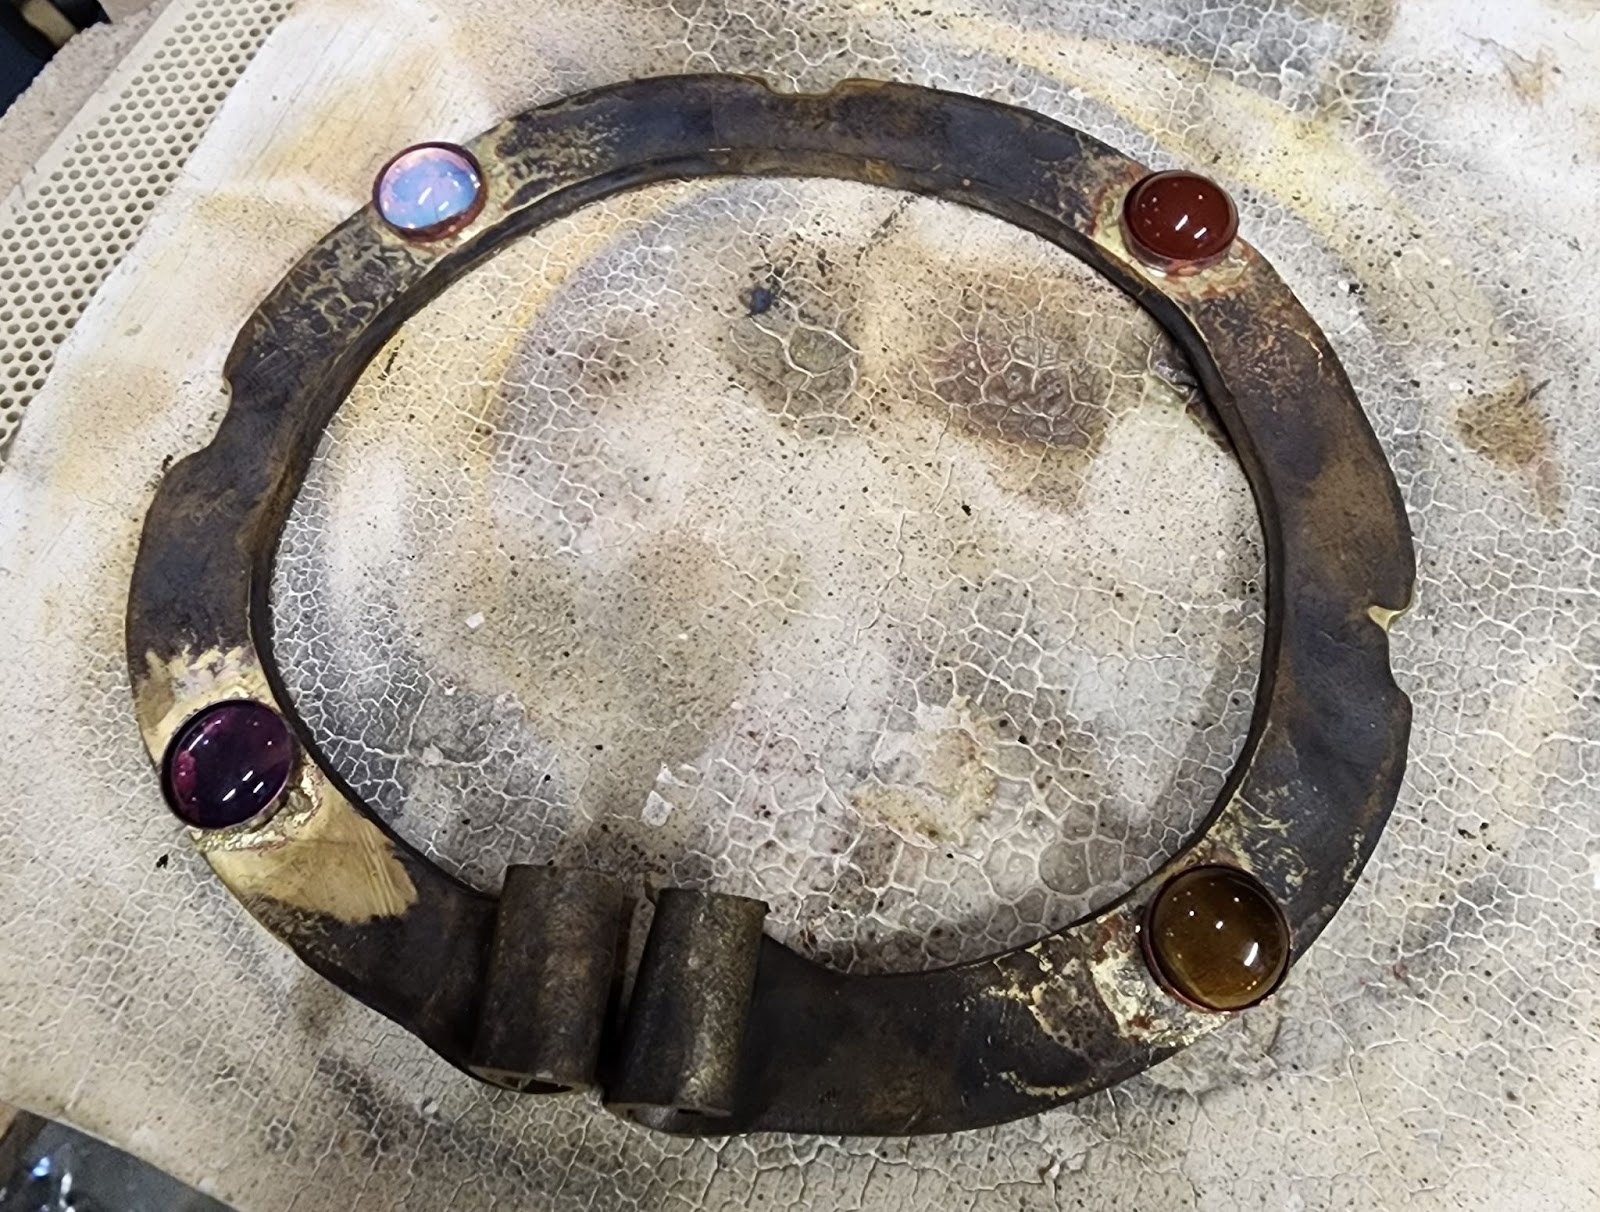
Fig. 18: Test-fit of gemstones
Because the piece was just heated for soldering, and the bezel cups are now in place, this is an ideal time to do the decorative stamping. I choose stamps from my collection that seem plausible for a Kievan Rus piece: a simple bar, the ubiquitous triangle-dot, and a small Orthodox cross stamp. I will only use the cross stamp once, at the top of the circle of the brooch.
I set the piece flat on my 15 pound anvil and strike the stamps very sharply with a 2-pound hammer. This results in good, clear, deep imprints.
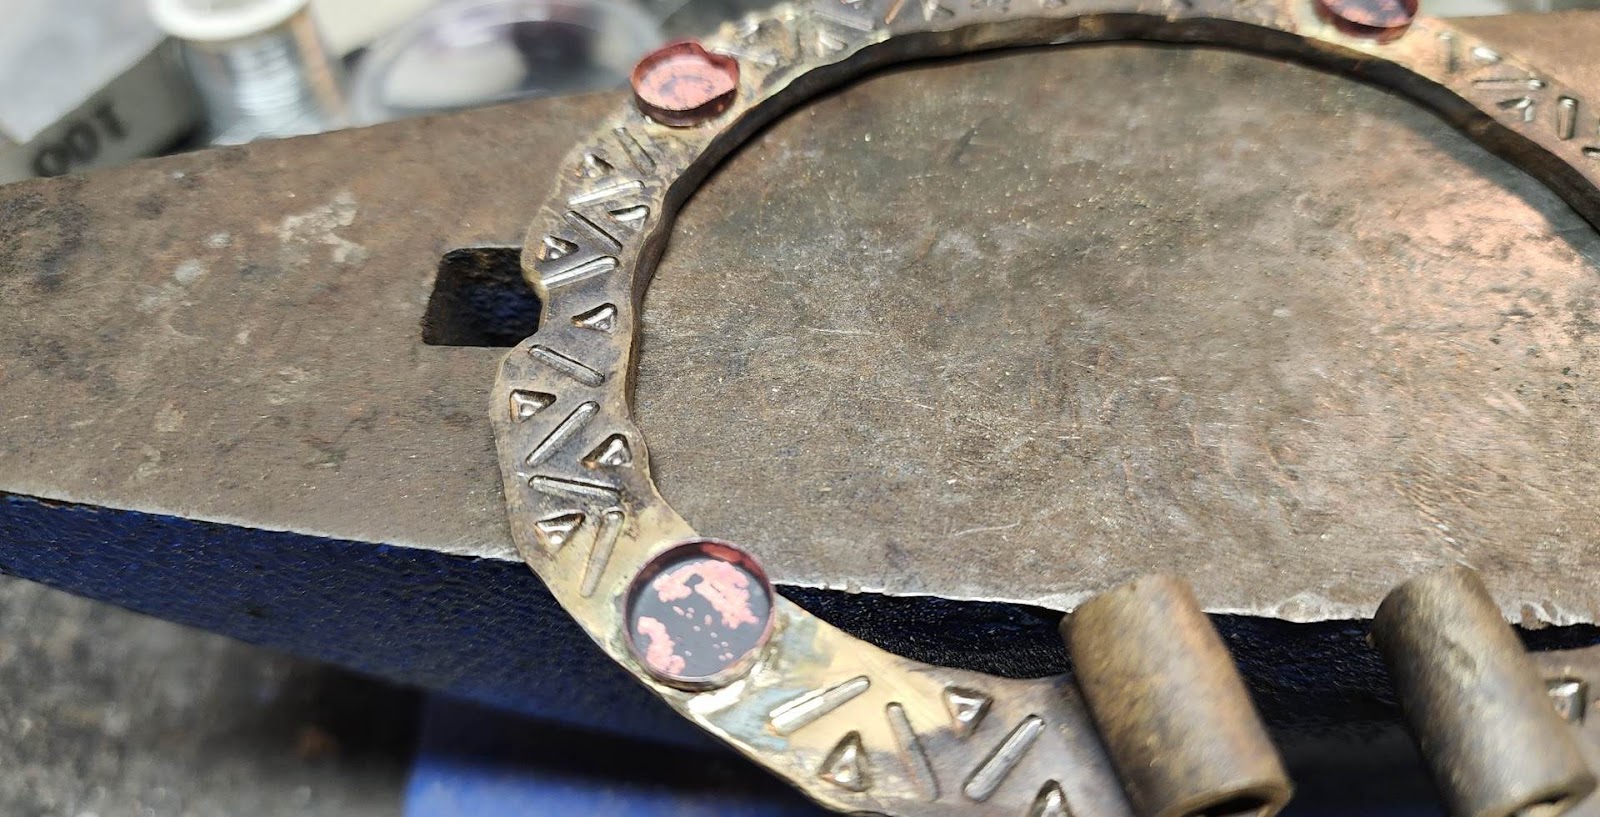
Fig. 19: Decorative stamping done
With the stamping done, the next step is polishing. Polishing is accomplished by using polishing compounds with a buffer machine. Very little effort is made to give this piece a perfect mirror polish; this could not have been accomplished in this period. I feel the piece has a more authentic look with an imperfect polish.
Cleaning the insides of bezel cups that are dirty with forge scale from being soldered is a truly miserable and tedious task, but necessary for mounting translucent gemstones such as moonstone and amethyst.
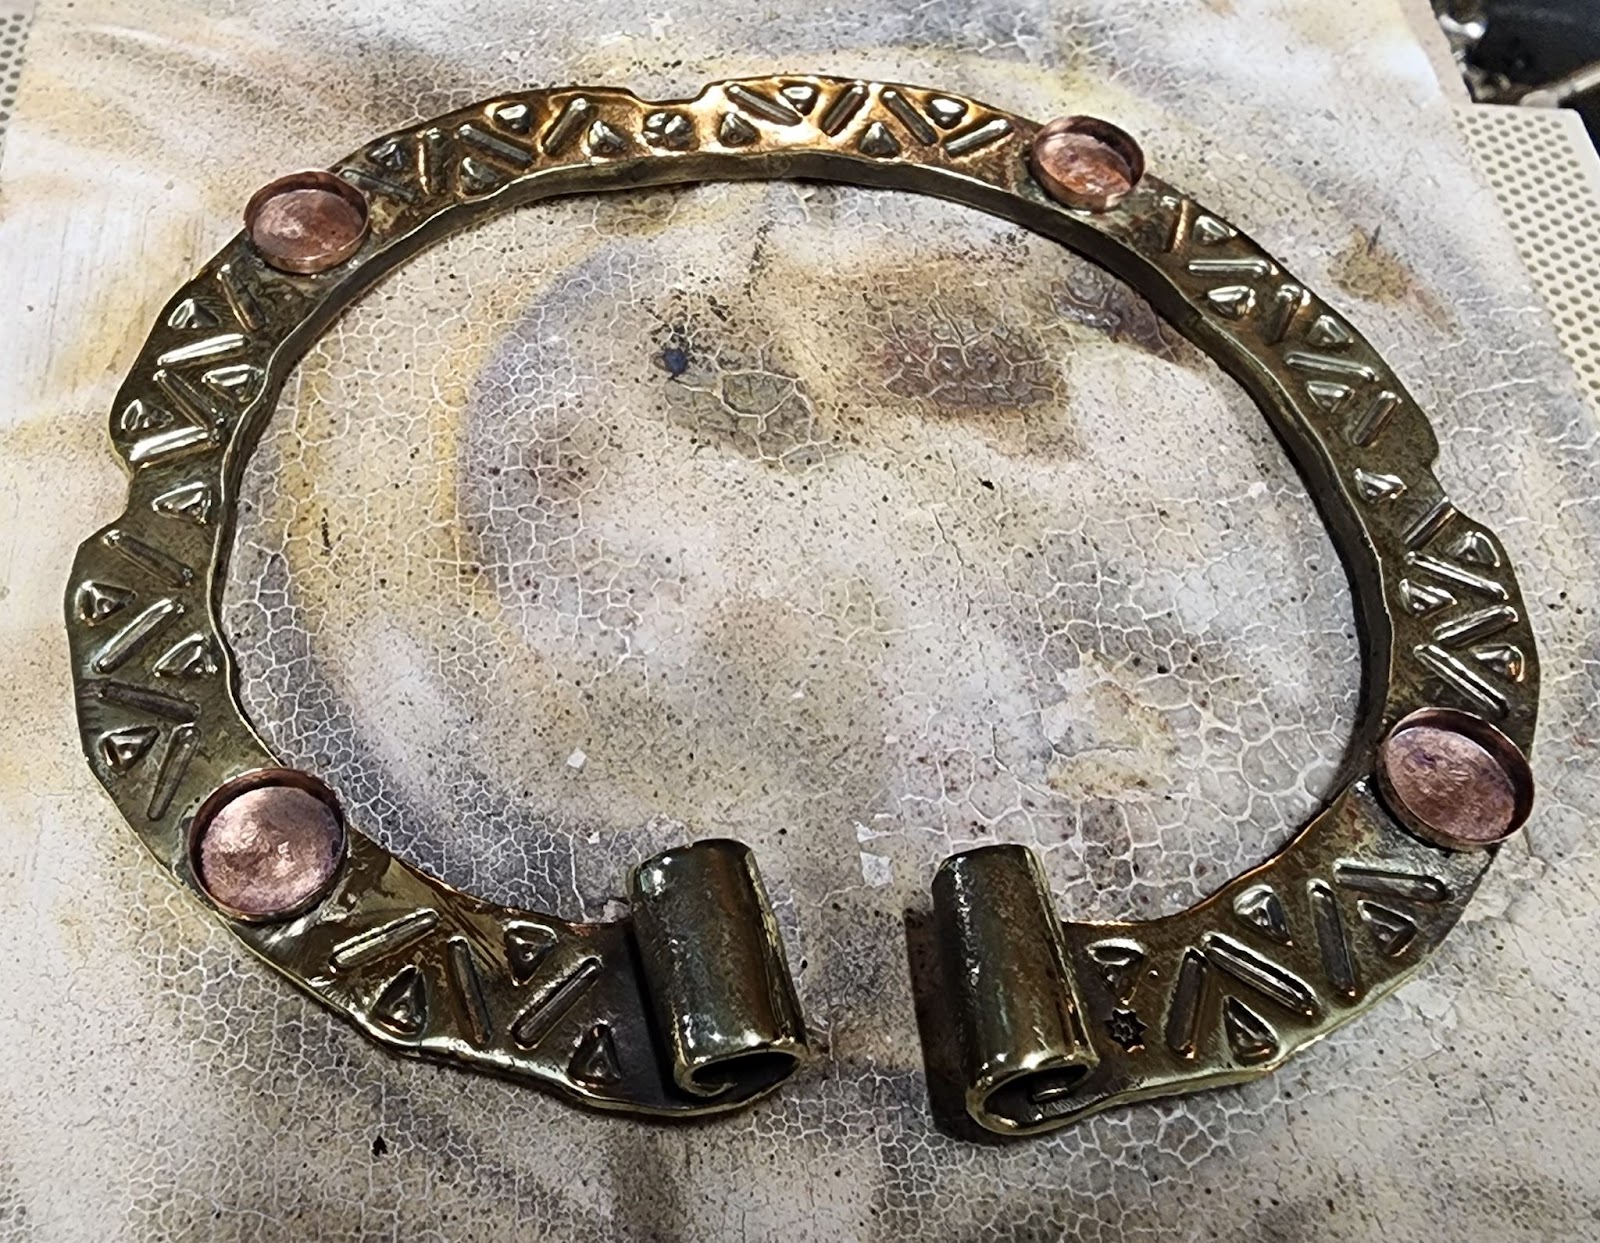
Fig. 20: Polished piece
At this point I also add my maker’s mark, then do a final cleanup with mineral spirits, which remove the residue of the polishing compound.
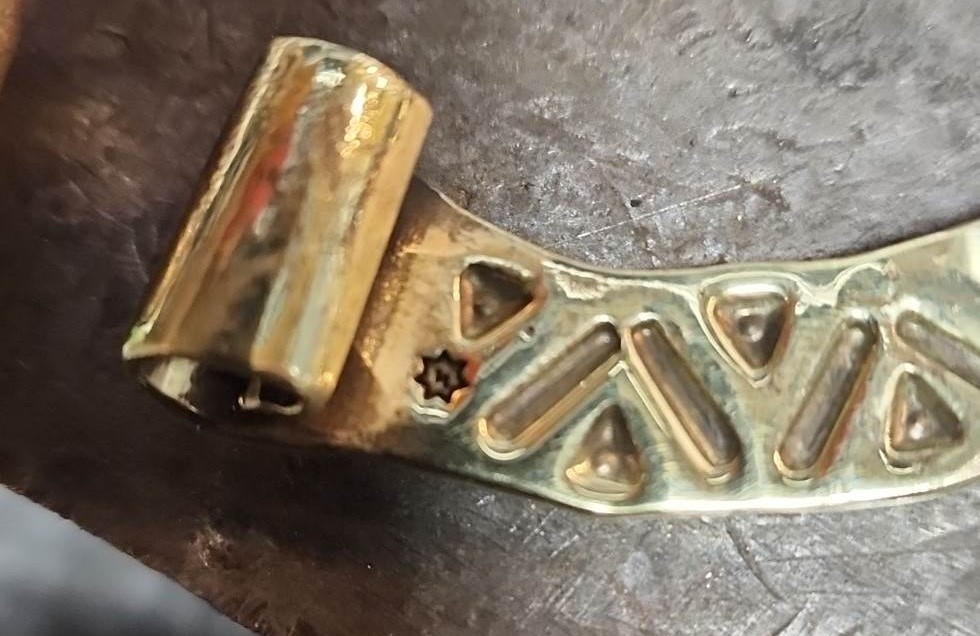
Fig. 21: Author’s maker’s mark, a septagram with a Sowilo (S) rune inside, for Snorri
Time now to mount the stones. A small drop of super-glue is placed in the bottom of each bezel cup, then the cabochon is placed in the cup and tapped gently snug with a small rubber hammer. Special jeweler’s stone-setting tools are then used to gently press the edges of the bezel cup up and around the edges of each stone. The resulting mount is quite secure.
Finally, I cut off a section of square brass wire and anneal it. One end is flattened, then clamped in the bench vice. The wire is then twisted to give it some sparkle and visual interest, then sharpened on the end by hammering, then filing. The pin is then polished, and the flattened end wrapped around the brooch body, taking care to leave the loop large enough to clear all the gemstones.
The final product looks like this:
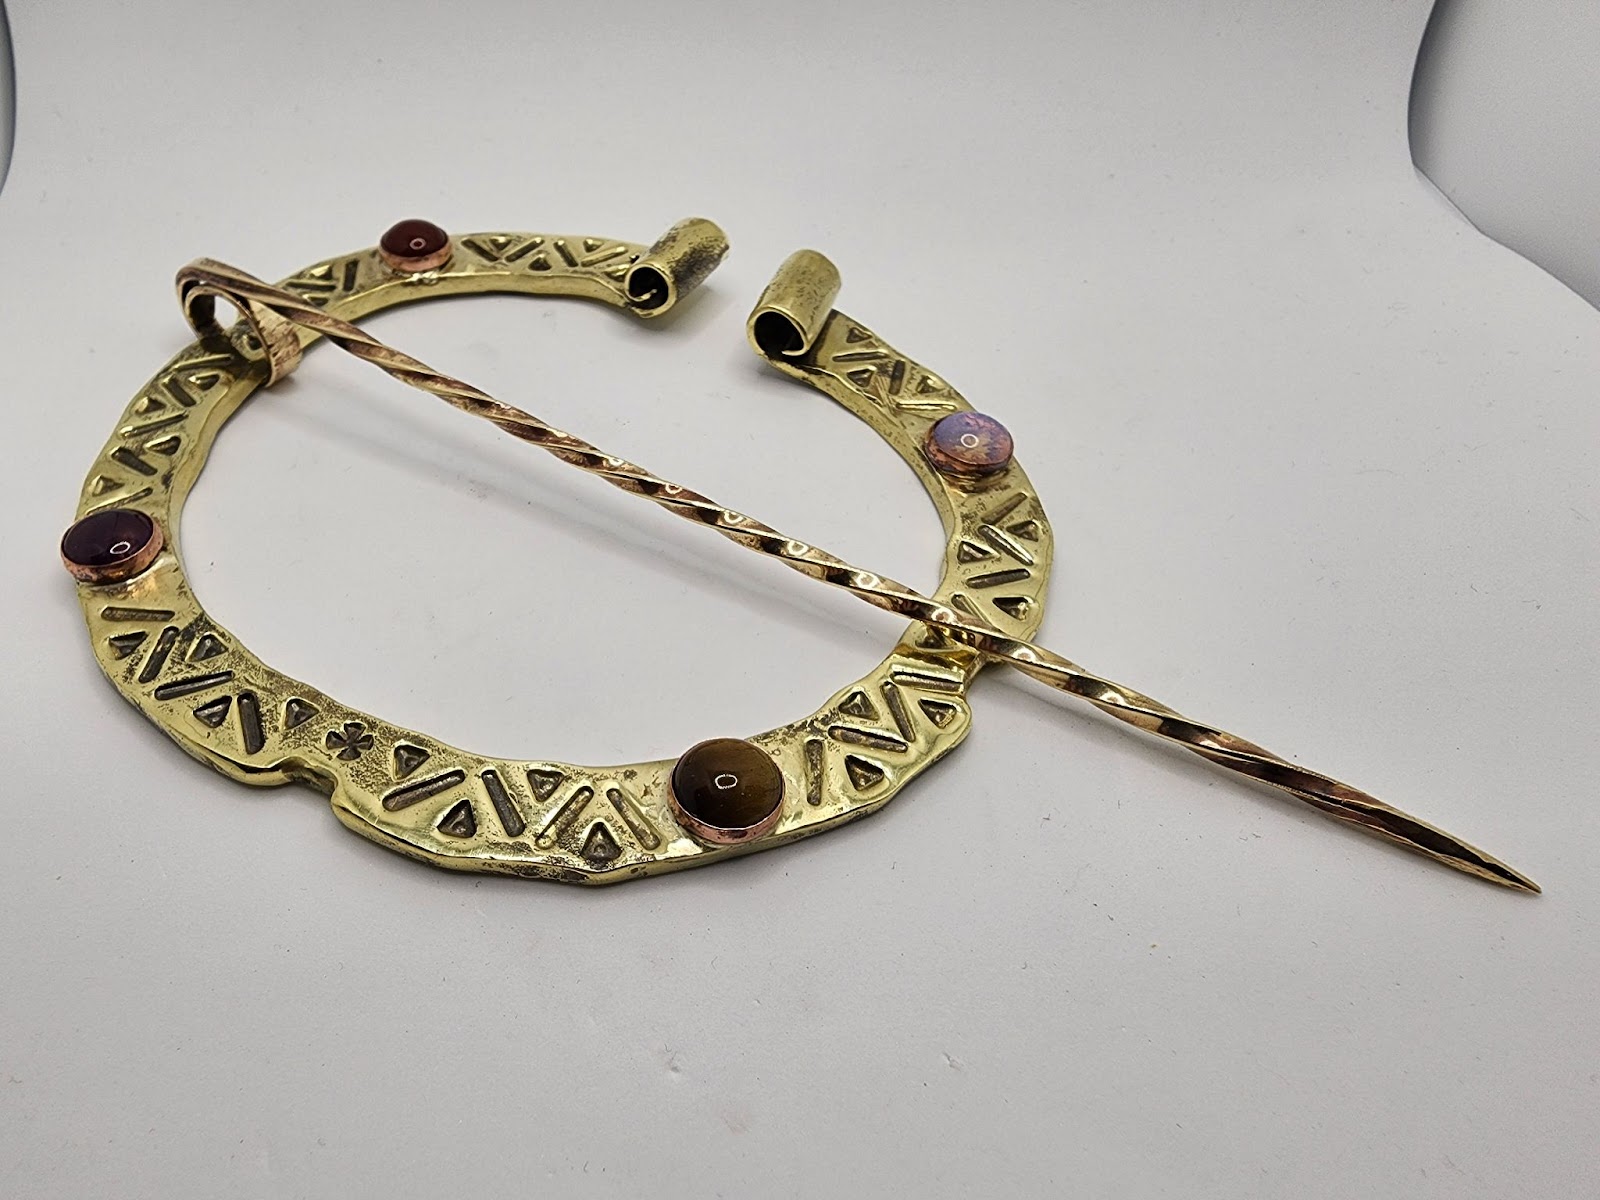
Fig. 22: The author’s finished piece
My methods vary from period methods solely due to my lack of skill and tools, primarily my lack of a forge, which necessitates the careful use of torches to anneal and join metal. I used vise-grips to twist the pin, as I do not own blacksmith’s tongs. Period metal polishing is thought to be quite similar to modern methods, using abrasives in a semi-fluid medium such as wax (similar to today’s jeweler’s rouge), probably applied with cloth strips and vigorously rubbed. For the sake of expediency, I used modern motorized buffers and polishers for that. Finally, I occasionally use a modern tool as a shortcut for efficiency; this accounts for my use of dykes to snip wire, rather than a cold chisel and hammer, and so forth.
However, most of the use of hand-tools is similar or identical to how they would have been used in period: the hammer-forging of the terminals, the decorative stamping, the shaping with mallets and mandrels, the polishing, filework, etc. all mimic closely period practices. The similarity to period pieces of my piece is an indicator that I am using the same tools in the same ways.
Future improvements could be:
- Hammering the body from an ingot
- Closer examination of period stone-setting methods and materials, so as to stop using commercial bezel cups
- Shaping my own stones
- Cleaner hammerwork
- Attempting period polishing techniques
- Acquisition of more period tools, such as swapping my 15 pound anvil for more period anvils, such as those found in the Mastermyr find
- Acquisition of a forge to attempt hot-joining instead of soldering
Appendix A: Silver Soldering
Silver solder material is made of silver, alloyed with various other metals to affect the melting point of the silver, including copper, zinc, and tin. It is sold in four grades: hard, medium, easy (sometimes called soft), and extra-easy (sometimes called easy) (Stice, 2019).
Table 1: Silver Solder Alloys
| TYPE | Ag | Cu | Zn | Sn |
| Extra Easy | 56% | 22% | 17% | 5% |
| Easy | 65% | 20% | 15% | – |
| Medium | 70% | 20% | 10% | – |
| Hard | 75% | 22% | 3% | – |
Operations that take multiple soldering jobs can then be accomplished by starting with hard solder, doing some work, then next medium solder, doing more work, and so forth. With careful application of heat, it is possible to make a lower grade solder flow without making the higher grade solder in the same location re-melt. This is a vital skill for a jeweler who, for example, wants to solder a ring shut, then solder a mount for a gemstone onto the ring.
Table 2: Silver Solder Melt & Flow Temperatures
| TYPE | Melt (F) | Flow (F) |
| Extra Easy | 1145° | 1205° |
| Easy | 1240° | 1325° |
| Medium | 1275° | 1360° |
| Hard | 1365° | 1450° |
Finally, care must be taken that the melting point of your raw materials is not lower than the melting point of your solder. Table 3 shows some common alloys and their melting points (EngineeringToolbox, 2005, and Smith & Glover).
Table 3: Melting Temperatures of Various Metals
| METAL | Melt (F) |
| Aluminum | 1220° |
| Brass, Red | 1832° |
| Brass, Yellow | 1706° |
| Copper | 1983° |
| Gold, 24k | 1945° |
| Iron, various | 2061° – 2899° |
| Lead | 622° |
| Nickel | 2647° |
| Pewter | 247° – 290° |
| Platinum | 3218° |
| Silver, coin (90%) | 1614° |
| Silver, pure (99.9%) | 1762° |
| Silver, sterling (92.5%) | 1639° |
| Steel, carbon | 2597° – 2804° |
| Steel, stainless | 2750° |
| Tin | 450° |
| Titanium | 5396° |
| Zinc | 787° |
Bibliography
Arwidsson, Greta, and Berg Gösta. The Mästermyr Find: A Viking Age Tool Chest from Gotland. Larson Pub. Co., 1999. Print.
Britannica, T. Editors of Encyclopaedia (2023, February 2). gemstone. Encyclopedia Britannica. https://www.britannica.com/science/gemstone
Costume of Kievan and North-Eastern Russia X-XIV centuries. (2004). Retrieved March 20, 2023, from https://www.cross-kpk.ru/ims/files/new/projekts/%D0%9C%D1%8B-%D1%81%D0%BB%D0%B0%D0%B2%D1%8F%D0%BD%D0%B5-%D0%A2%D0%9E%D0%9B%D0%AC%D0%9A%D0%9E_%D1%84%D0%BE%D1%82%D0%BE_%D0%B8_%D0%B2%D0%B8%D0%B4%D0%B5%D0%BE/slavane/biblioteka/costum/kiev.htm
Horbach, O. (1989). Izbornik of Sviatoslav (1073). Retrieved March 21, 2023, from http://www.encyclopediaofukraine.com/display.asp?linkpath=pages%5CI%5CZ%5CIzbornikofSviatoslav1073IT.htm
Metals and alloys – melting temperatures. Engineering ToolBox. (2005). Retrieved March 21, 2023, from https://www.engineeringtoolbox.com/melting-temperature-metals-d_860.html
Rybakov, B. A. (1997). Early Rus Life and Culture (Vol. 16). Electronic copy available via Baron Snorri upon request.
Smith, & Glover. (n.d.). What is lead free pewter ? What is Lead Free Pewter ? Retrieved March 21, 2023, from https://www.gloverandsmith.co.uk/28/about-lead-free-pewter/
Stice, E. (2019, January 8). Types of silver solder used in jewelry. Halstead. Retrieved March 21, 2023, from https://www.halsteadbead.com/articles/types-of-silver-solder-in-jewelry
Williamson, R. (2003, March 31). Non-ferrous metal working. Regia Anglorum – Anglo-Saxon and Viking Crafts – Non-ferrous Metalworking. Retrieved March 21, 2023, from https://regia.org/research/life/othermetalwork.htm
Yavtushenko, I. G. (1982). Museums in Kiev: An overview. Museum International, 34(3), 140–149. https://www.tandfonline.com/doi/abs/10.1111/j.1468-0033.1982.tb00384.x Electronic copy available via Baron Snorri upon request.
****************************************
Please be aware that some attributions did not survive the conversion from Google Doc to WordPress article. I do not have the ambition to correct this issue. In the unlikely event you plan to cite this article for anything, please use the following as the canonical reference:

Wonderful work. Thanks for sharing.
LikeLike